change workspace JRE in Eclipse
While creating your java project if you get warning “The current workspace uses 1.4 JRE…”
OR
If you want to change workspace JRE in Eclipse
OR
If any of existing project you are importing into your eclipse workspace and get No JREs in workspace compatible with specified execution environment. Please follow below steps to Change workspace JRE in Eclipse or install new one:
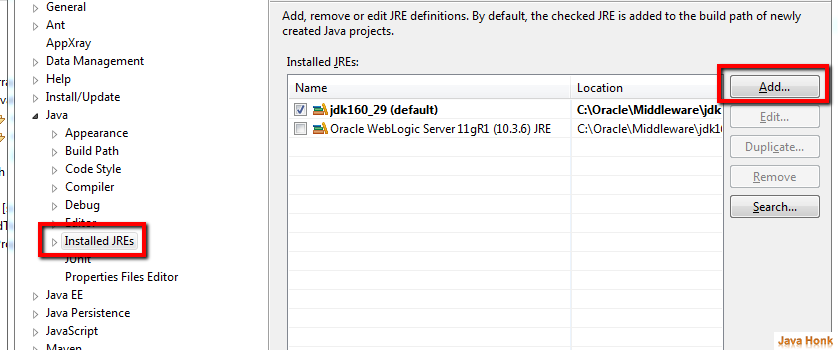
- Open your eclipse
- Click Window –> Preferences –> Java –> Installed JREs — Click Add
- Keep defalut JRE type i.e. Standard VM then click Next

- In next JRE definition window select JRK Home, JRE name and keep Default VM argument blank(Because this time we are not setting anything for VM argument). Click Finish. Please see below:

- Now you will see newly added JRE. Please check it active for the project. Click OK to finish it.

- Now new selected change JRE is active .
- That’s it for change workspace JRE in Eclipse
