EJB 3 Hello World JBoss
In this demo you will see how to create simple EJB 3 where we will print Hello World on console. Please follow below steps:
Below are needed:
- JBoss Application Server 5.1 community version
- Eclipse 3.3 or up (For this demo we have used Kepler)
Steps:
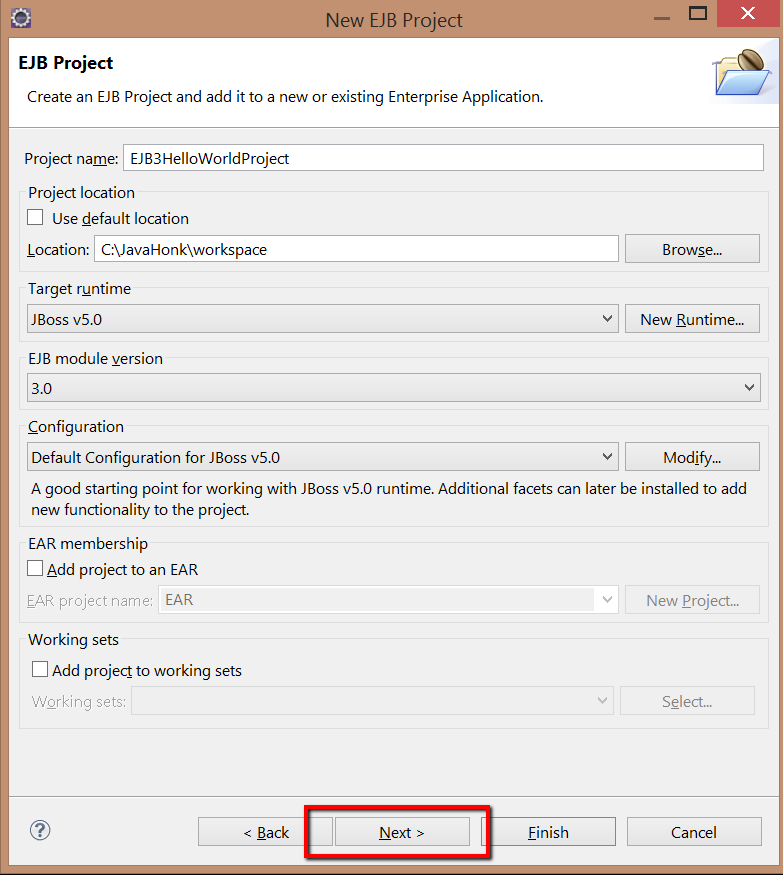
- Create EJB project EJB3HelloWorldProject
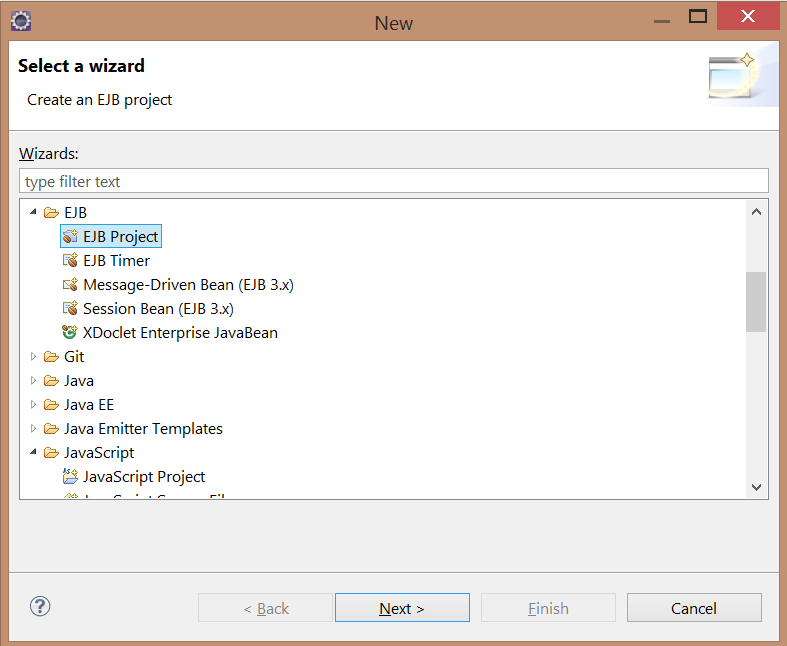
- Click File –> New –> Other –> EJB –> EJB Project –> Next
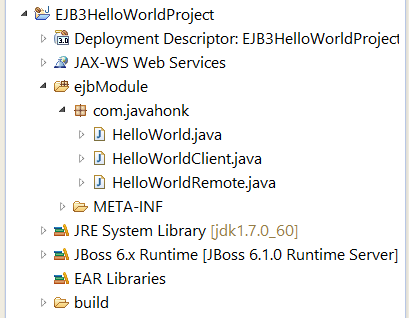
- Final project structure:
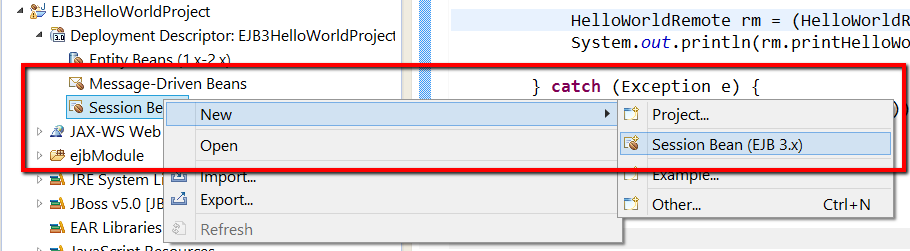
- Now create Stateless session bean with its remote interface. Expand project –> expande deployment descriptor –> Right click Session Bean –> New –> Session Bean
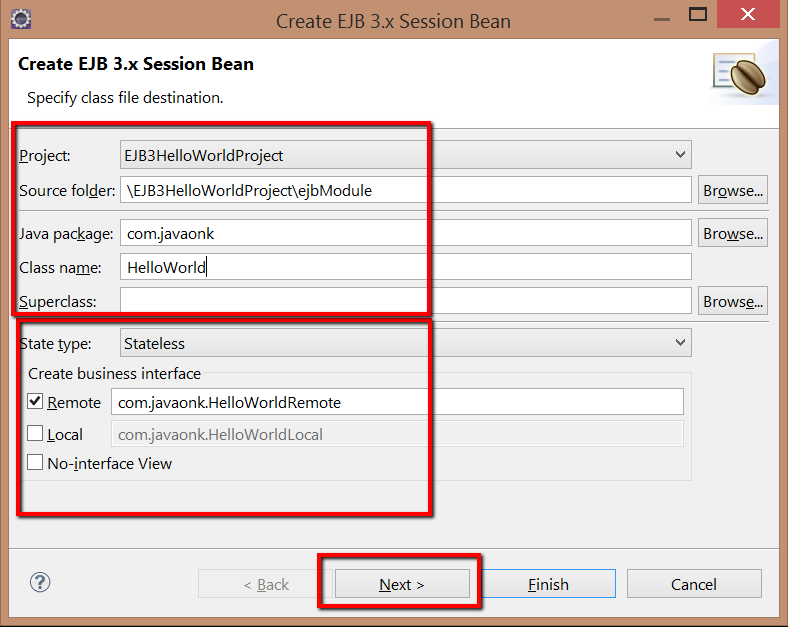
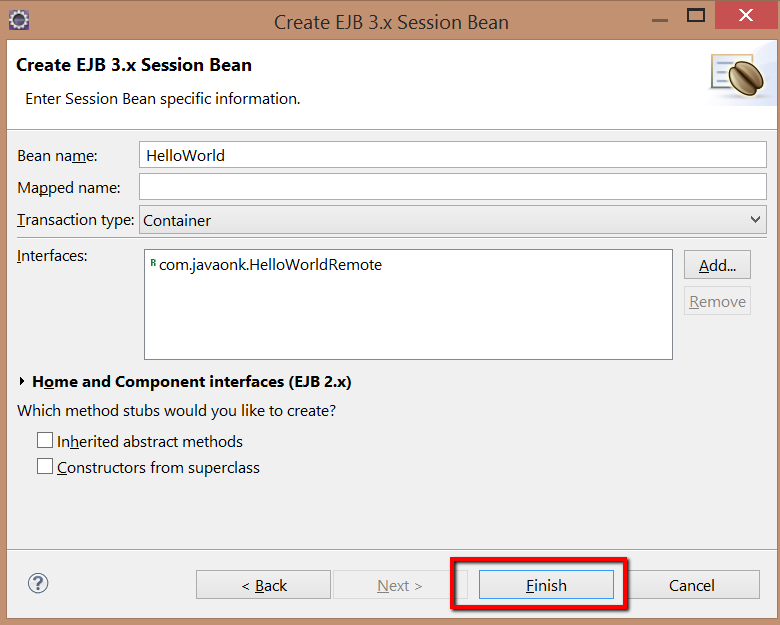
- Enter value as shown below:
- In newly created created stateless session bean and remote interface please add below method:
package com.javahonk;

import javax.ejb.Stateless;

/**
 * Session Bean implementation class HelloWorld
 */
@Stateless
public class HelloWorld implements HelloWorldRemote {

    /**
     * Default constructor.
     */
    public HelloWorld() {
        // TODO Auto-generated constructor stub
    }

	public String printHelloWorld() {
		return "EJB 3 Hello World!!!";
	}

}
package com.javahonk;

import javax.ejb.Remote;

@Remote
public interface HelloWorldRemote {

	public String printHelloWorld();
}
- Now create HelloWorldClient in same package and paste below code:
package com.javahonk;

import java.util.Properties;
import javax.naming.Context;
import javax.naming.InitialContext;

public class HelloWorldClient {

	public static void main(String[] args) {
		try {
			Properties p = new Properties();
			p.put(Context.INITIAL_CONTEXT_FACTORY, "org.jnp.interfaces.NamingContextFactory");
			p.put(Context.PROVIDER_URL, "localhost:1099");
			p.put(Context.URL_PKG_PREFIXES, "org.jboss.naming:org.jnp.interfaces");
			InitialContext ctx = new InitialContext(p);

			HelloWorldRemote helloWorldRemote = (HelloWorldRemote) ctx.lookup("HelloWorld/remote");
			System.out.println(helloWorldRemote.printHelloWorld());

		} catch (Exception e) {
			System.out.println(e.getMessage());
		}

	}

}
- We are all done with EJB 3 classes. Before run this project you will have to configure JBoss server to eclipse and if are not sure how to do it please use this tutorial. Now to run project on JBoss server –> Right click Project –> Run As –> Run on Server
- Once server is started please verify below if EJB3HelloWorldProject successfully deployed or not using below reference:

- Now run the HelloWorldClient –> Right click –> Run As –> Java Client you will below output:

- That’s it for more information on EJB 3 please use this link
![]() Download Project: EJB3HelloWorldProject
Download Project: EJB3HelloWorldProject
