EJB 3 Local Remote Interface example
In this example you will see how to create EJB 3 application with local and remote interface.
Local Interface: This interface has been introduced for client if he is running in the same container.
Remote Interface: As per its definition it’s designed for client which resided out side of the EJB container.
Important: It’s confusing if you are thinking about if web application which is not inside EAR file and packaged in separate WAR file but running on same instance of application server.
Answer: Once beans which is annotated with @Local then it will accessed only in same application means client should be packaged in same EAR file. If application has been packaged in different WAR and EAR file means it’s two different application here remote interface will be called.
Below are needed:
- JBoss Application Server 5.1 community version
- Eclipse 3.3 or up (For this demo we have used Kepler)
Steps:
- Create project name EJB3
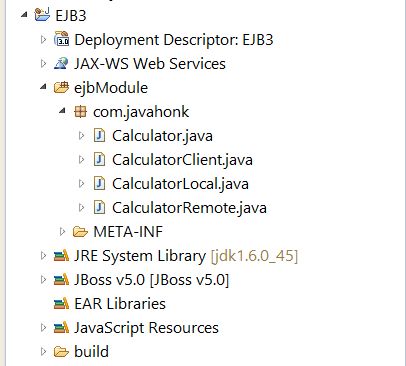
- Final project structure
- Calculator.java
package com.javahonk;

import javax.ejb.Stateless;

/**
 * Session Bean implementation class Calculator
 */
@Stateless
public class Calculator implements CalculatorRemote, CalculatorLocal {

    /**
     * Default constructor.
     */
    public Calculator() {
        // TODO Auto-generated constructor stub
    }

	@Override
	public Integer addNumbers(Integer i, Integer j) {
		return i+j;
	}


}
- CalculatorLocal.java
package com.javahonk;

import javax.ejb.Local;

@Local
public interface CalculatorLocal {
	public Integer addNumbers(Integer i, Integer j);
}
- CalculatorRemote.java
package com.javahonk;

import javax.ejb.Remote;

@Remote
public interface CalculatorRemote {
	public Integer addNumbers(Integer i, Integer j);
}
- CalculatorClient.java
package com.javahonk;

import java.util.Properties;
import javax.naming.Context;
import javax.naming.InitialContext;

public class CalculatorClient {

	public static void main(String[] args) {
		try {
			Properties p = new Properties();
			p.put(Context.INITIAL_CONTEXT_FACTORY, "org.jnp.interfaces.NamingContextFactory");
			p.put(Context.PROVIDER_URL, "localhost:1099");
			p.put(Context.URL_PKG_PREFIXES, "org.jboss.naming:org.jnp.interfaces");
			InitialContext ctx = new InitialContext(p);

			CalculatorRemote calculatorRemote = (CalculatorRemote) ctx.lookup("Calculator/remote");
			System.out.println("Total of 9+3: "+calculatorRemote.addNumbers(9, 3));

		} catch (Exception e) {
			System.out.println(e.getMessage());
		}

	}

}
- We are all done with EJB 3 classes. Before run this project you will have to configure JBoss server to eclipse and if are not sure how to do it please use this tutorial. Now to run project on JBoss server –> Right click Project –> Run As –> Run on Server
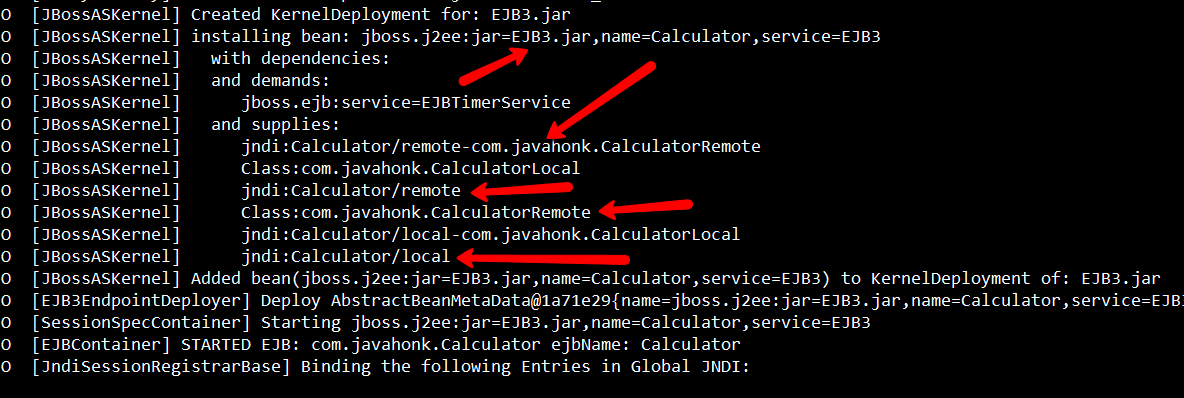
- Once server is started please verify below on console:
- Run the CalculatorClient –> Right click –> Run As –> Java Applicaton:
- That’s it for more information on EJB 3 please use this link
![]() Download Project: EJB3
Download Project: EJB3


