Create Maven Project IntelliJ – IntelliJ Idea comes with fully integrated with Maven default version which will help your project to configure/automate build process. In IntelliJ you can easily create maven java project OR you can open sync with existing project OR add maven to any existing project. Maven can also be configure, manage multi level project. Here we will be creating sample maven web project and later on we will see how to configure application server, run and deploy on newly configure application server.
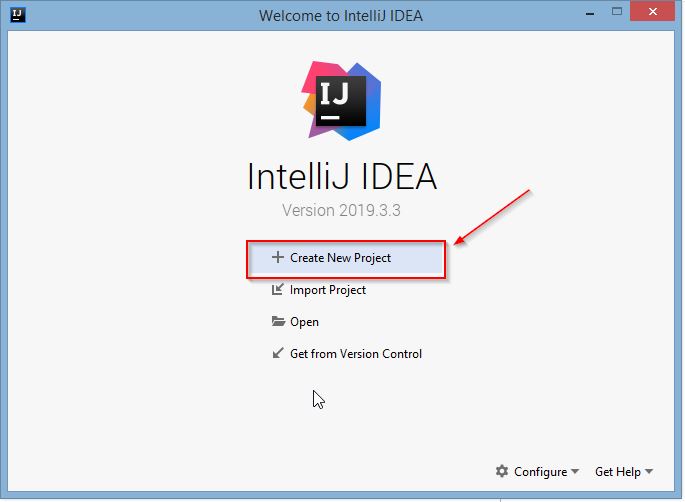
1. Open Intellij (Note: We are using IntelliJ Ultimate with version: 2019.3) then click Create New Project
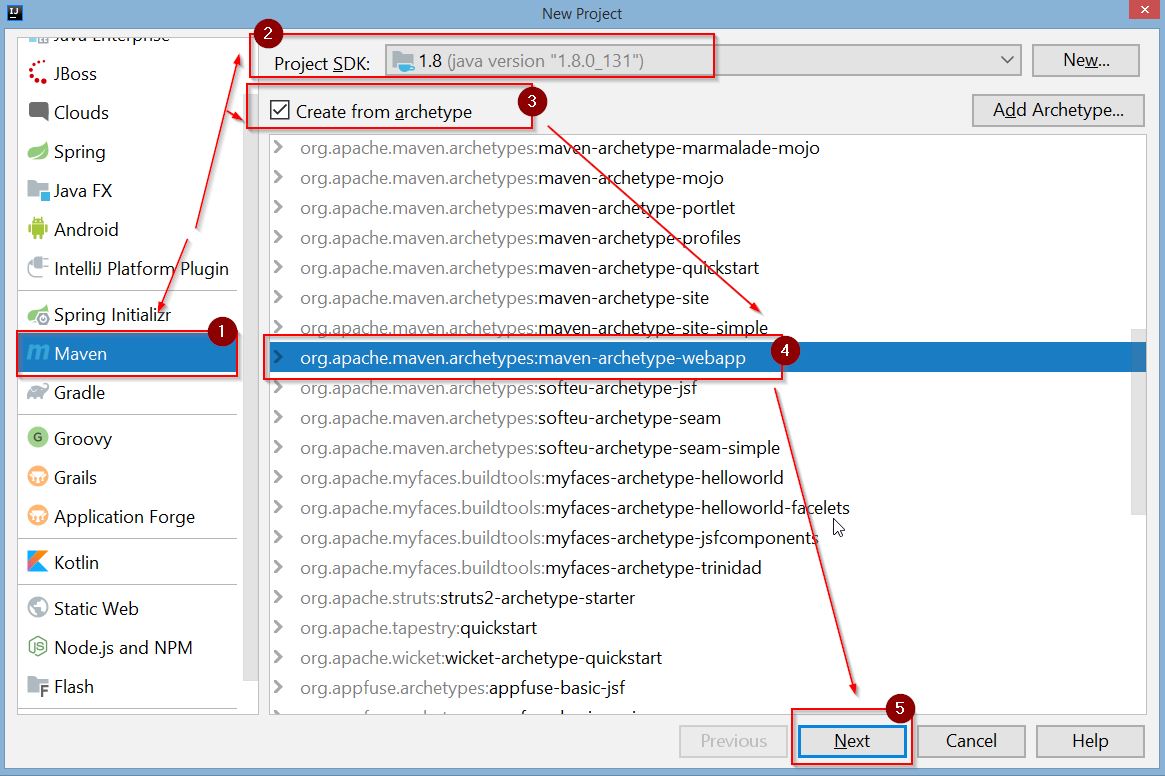
2. It will open new project window below and choose accordingly based on the image:

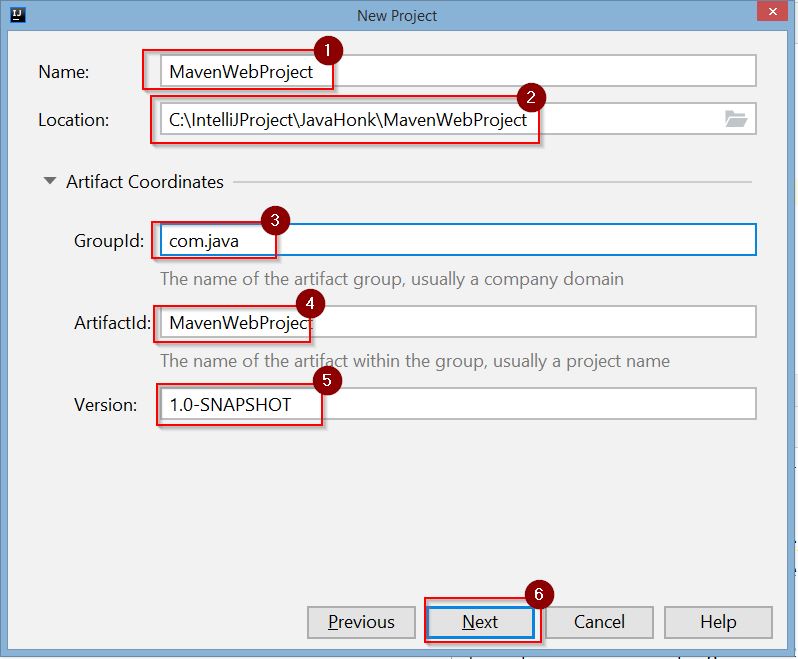
3. In next page of the window, please add following Maven coordinates that are added into the pom.xml file:
Name – Give name of your newly created project
Location – IntelliJ will default location of your project but if you want to change it, you can click folder icon choose wherever you want.
GroupId – Package of your new project.
ArtifactId – Name of your project.
Version – Version of a new project. By default, this field is specified automatically.
When all done click Next:
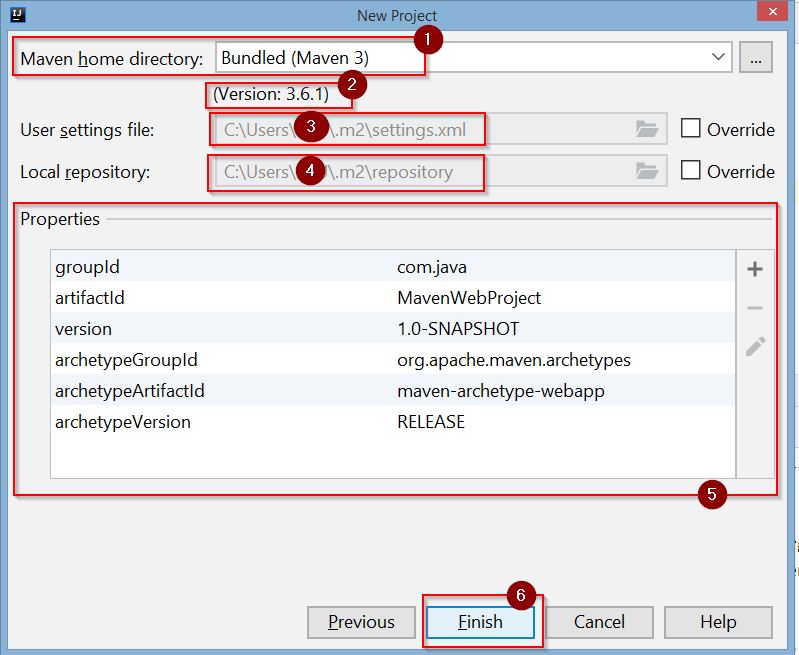
4. On next window everything will come as default including user settings file, local repository location and previously chosen properties. Keep everything unchanged and click Finish:
5. Finally you will see Java Maven project got created as below:
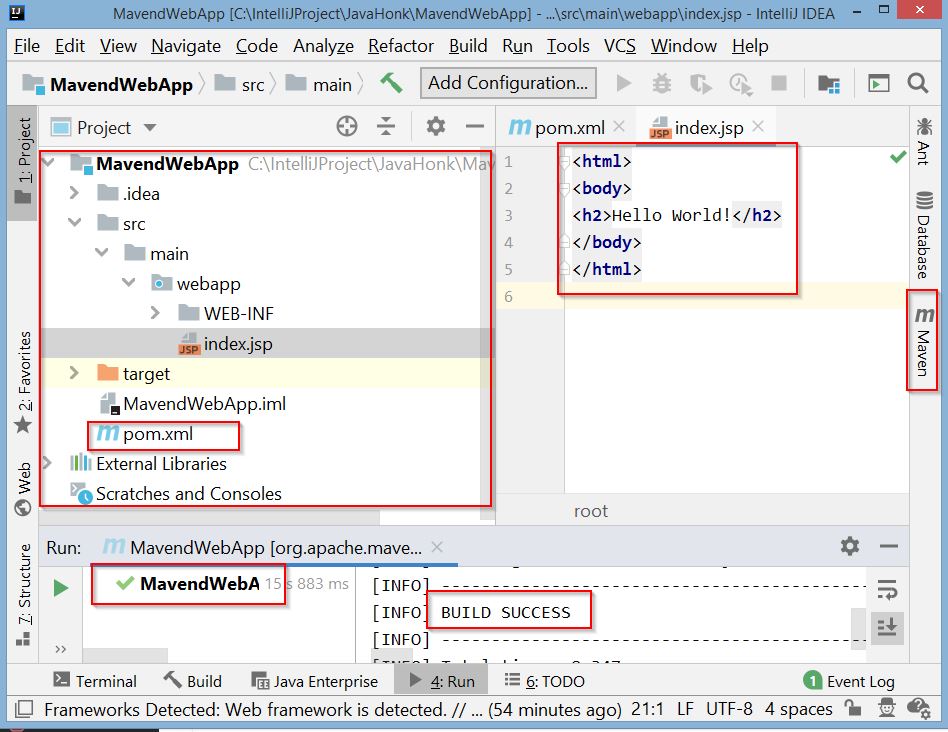
6. That’s It. For more information please visit IntelliJ
