ICE Hello World Java
ZeroC ICE (Internet Communications Engine) is latest distributed computing platform which provides comprehensive Remote Procedure Calls (RPC) and supports Java, .NET, C++, Python, Objective-C, PHP, Ruby, and JavaScript. It’s getting famous day by day and big/small companies adapting in their service oriented architecture framework. Apart from RPC this framework also provides network infrastructure and many other features for technical application. As to start with it and understand how its RPC works, we will create simple Hello World program where we will run server and client separately.
Tools needed:
- Eclipse any version
- ICE jar (I am using Ice-3.5.1 which is latest as of today). Please download and install ICE using this tutorial and go to it’s lib folder (default location: C:\Program Files (x86)\ZeroC\Ice-3.5.1\lib) and include ICE.jar in your project.
- JDK 1.6
Steps:
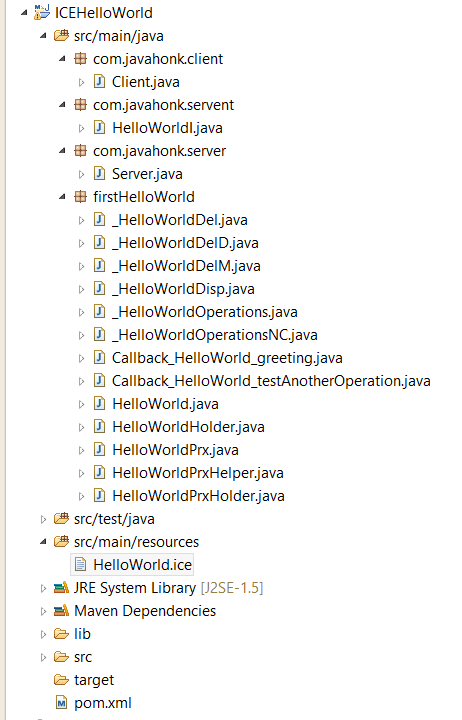
- Create maven project name: ICEHelloWorld below is final project structure:
- Create HelloWorld.ice inside src/main/resources folder and copy paste below code:
module firstHelloWorld{
    interface HelloWorld{
        void greeting(string value);
        void testAnotherOperation(string value);
    };
};- To work with ICE you will first have to create ICE file where you define all operations which you want to expose. As you see in the first line “module” it’s nothing but package name in ICE and inside you define your interface. Our module name is firstHelloWorld so when you generate code from this it will create package name “firstHelloWorld” and put all generated code inside it.
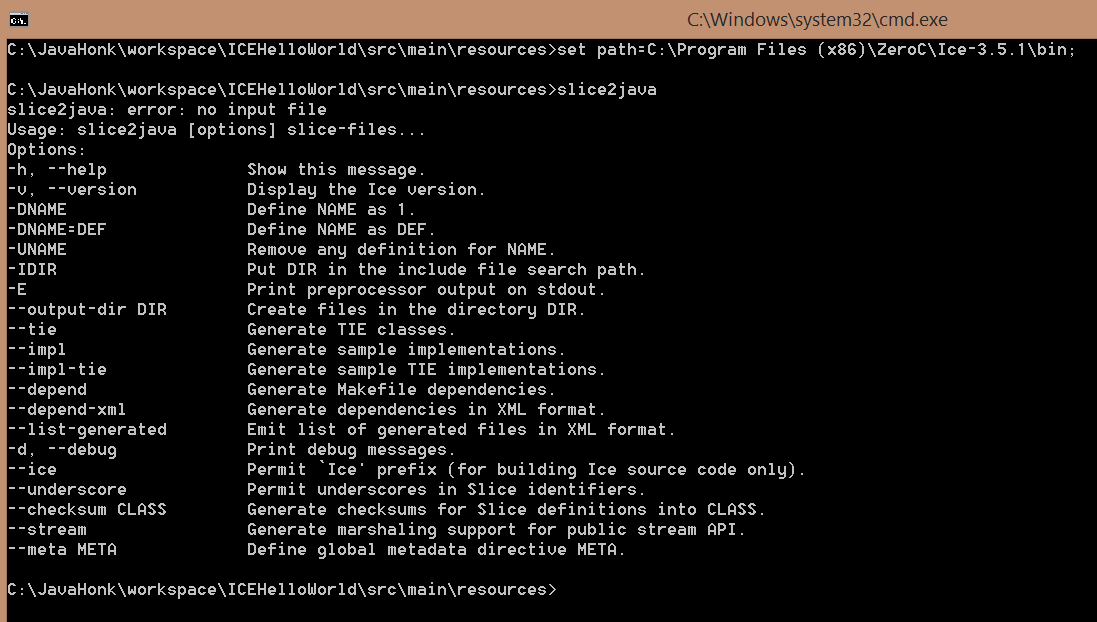
Now open your window command window and CD to location of ICE file and set class path for slice2java.exe as below:
- To check if path has been set and you start using slice2java command to generate java file, please use below command you will see below:
- Now to generate java file use below command:
slice2java –output-dir C:\JavaHonk\workspace\ICEHelloWorld\src\main\java HelloWorld.ice
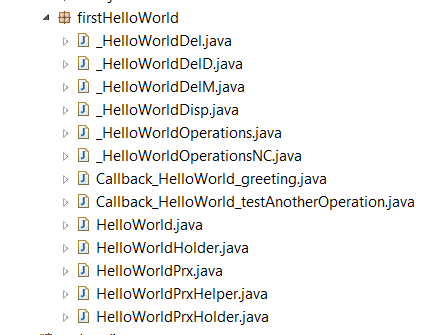
- Go to your project and refresh it you will below package got created with all generate files:
- Servent class: To implement HelloWorld interface, you will have to create servant class. By convention, servant classes use the name of their interface with an I‑suffix, so we will create servant class called HelloWorldI which will extend _HelloWorldDisp abstract class generate by sliece2Java command which internally implements interface HelloWorld where we had defined all operations. Copy paste below code:
HelloWorldI.Java:
package com.javahonk.servent;

import Ice.Current;
import firstHelloWorld._HelloWorldDisp;

public class HelloWorldI extends _HelloWorldDisp{

    private static final long serialVersionUID = 1L;

	public void greeting(String value, Current __current) {
		System.out.println("Java Honk first ICE application: "+value);

	}

	public void testAnotherOperation(String value, Current __current) {
		System.out.println("Value was passed: "+value);

	}


}
- Remote Server class: Create class Server.java inside package com.javahonk.server and copy paste below code:
package com.javahonk.server;

import com.javahonk.servent.HelloWorldI;

public class Server {

	public static void main(String[] args) {

		Ice.Communicator ic = null;

		try {

			System.out.println("Initialize ice run time...");
			ic = Ice.Util.initialize(args);

			// Creates object adapter and its mandatory to trail it with name Adapter. Port number 10000 to receive the request
			System.out.println("Create object adapter, listening on port 10000...");
			Ice.ObjectAdapter adapter = ic.createObjectAdapterWithEndpoints("JavaHonkAdapter", "default -p 10000");

			System.out.println("Create object out from servant interface...");
			Ice.Object object = new HelloWorldI();

			System.out.println("It's required to add adapter into servent...");
			adapter.add(object, Ice.Util.stringToIdentity("JavaHonk"));

			System.out.println("Activating adapter, waiting to process request...");
			adapter.activate();

			ic.waitForShutdown();

		} catch (Exception exception) {
			exception.printStackTrace();
			System.exit(1);
		} finally {
			if (ic != null) {
				ic.destroy();
			}
		}

	}

}
- Finally write client.java class which will make remote call and print its value:
package com.javahonk.client;

import firstHelloWorld.HelloWorldPrx;
import firstHelloWorld.HelloWorldPrxHelper;

public class Client {

	public static void main(String[] args) {

		Ice.Communicator ic = null;
		try {
			// Initialize Ice run time
			ic = Ice.Util.initialize(args);

			// Access to remote adapter JavaHonk agent
			Ice.ObjectPrx base = ic.stringToProxy("JavaHonk:default -p 10000");

			// Convert proxy
			HelloWorldPrx helloWorld = HelloWorldPrxHelper.checkedCast(base);

			// Check if conversion proxy is valid
			if (helloWorld == null) {
				throw new Error("Proxy is invalid");
			}

			// Call the method and pass the value
			helloWorld.greeting("Hello World");
			helloWorld.testAnotherOperation("Java Honk Hello World!");
		} catch (Exception e) {
			e.printStackTrace();
			System.exit(1);
		} finally {
			if (ic != null) {
				ic.destroy();
			}
		}
		System.exit(1);
	}

}
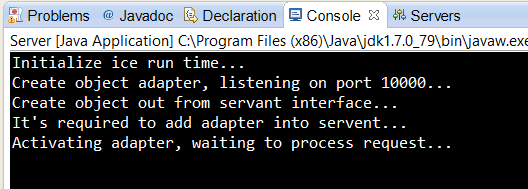
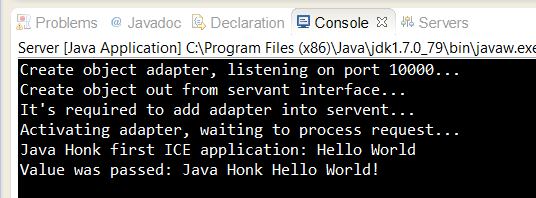
- Now we are ready to run our remote procedure client server call. First run Server.java as java application then run client.java class you will see below successful output:
Client console output:
- That’s it for ICE Hello World Java application. For more information please visit ICE official tutorial here and here
![]() Download Project: ICEHelloWorld
Download Project: ICEHelloWorld

