Create java spring hello world
This demo will show you how to Create java spring hello world. Basically this project is standalone java spring project to show you how to load bean through ClassPathXmlApplicationContext as standalone application and finally print message Hello World! on console. Please follow below steps:
Below technology have been used:
- Maven 3
- JDK 1.6
- Eclipse Kepler
- Spring 2.5.6
Steps:
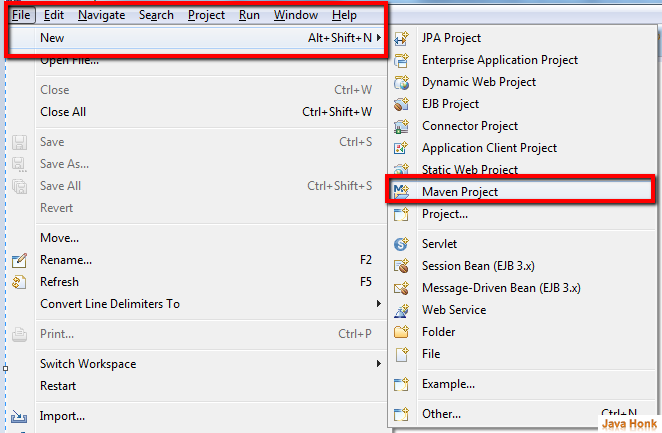
- Create Maven project in eclipse : Open your eclipse –>Click File –> New –> Maven Project
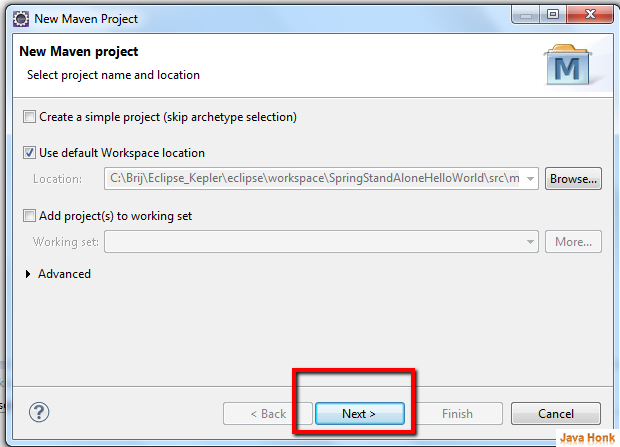
- It will open New Maven project window click Next
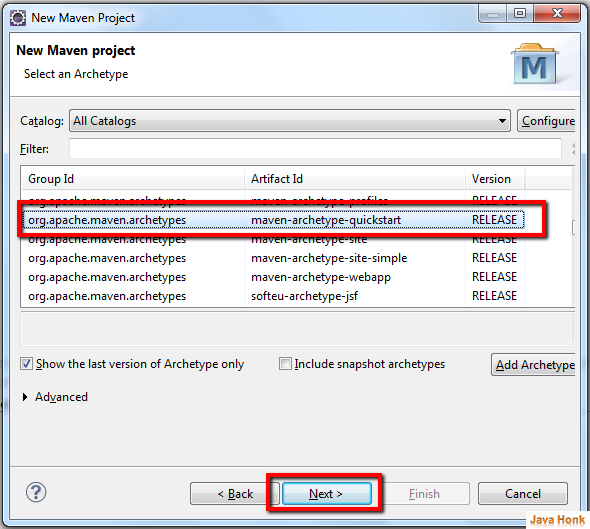
- Next window choose as below then click Next
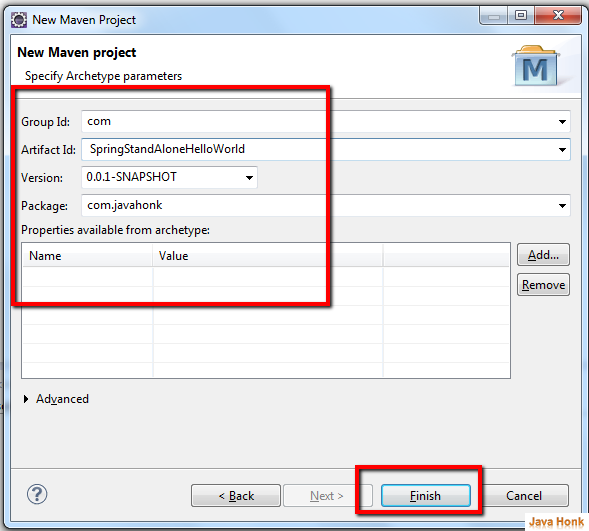
- Next window enter as below once entered all click Finish
- Now you will project name SpringStandAloneHelloWorld created in eclipse
- Open your pom.xml file and copy paste below code
<project xmlns="http://maven.apache.org/POM/4.0.0" xmlns:xsi="http://www.w3.org/2001/XMLSchema-instance"
  xsi:schemaLocation="http://maven.apache.org/POM/4.0.0 http://maven.apache.org/xsd/maven-4.0.0.xsd">
  <modelVersion>4.0.0</modelVersion>

  <groupId>com</groupId>
  <artifactId>SpringStandAloneHelloWorld</artifactId>
  <version>0.0.1-SNAPSHOT</version>
  <packaging>jar</packaging>

  <name>SpringStandAloneHelloWorld</name>
  <url>http://maven.apache.org</url>

  <properties>
    <project.build.sourceEncoding>UTF-8</project.build.sourceEncoding>
  </properties>

  <dependencies>
    <dependency>
      <groupId>junit</groupId>
      <artifactId>junit</artifactId>
      <version>3.8.1</version>
      <scope>test</scope>
    </dependency>

    <dependency>
		<groupId>org.springframework</groupId>
		<artifactId>spring</artifactId>
		<version>2.5.6</version>
	</dependency>
  </dependencies>
</project>
- Maven creates default class App.java when use quick start java project.Copy and paste below code to App.java file:
package com.javahonk;

import org.springframework.context.ApplicationContext;
import org.springframework.context.support.ClassPathXmlApplicationContext;

/**
 * Hello world!
 *
 */
public class App {
	public static void main(String[] args) {
		ApplicationContext context = new ClassPathXmlApplicationContext("Bean.xml");

		HelloWorldBean obj = (HelloWorldBean) context.getBean("helloWorld");

		obj.getMessage();
	}
}
- Create bean class HelloWorldBean.java and copy paste below code:
package com.javahonk;

public class HelloWorldBean {
	private String message;

	   public void setMessage(String message){
	      this.message  = message;
	   }

	   public void getMessage(){
	      System.out.println("Message : " + message);
	   }
}
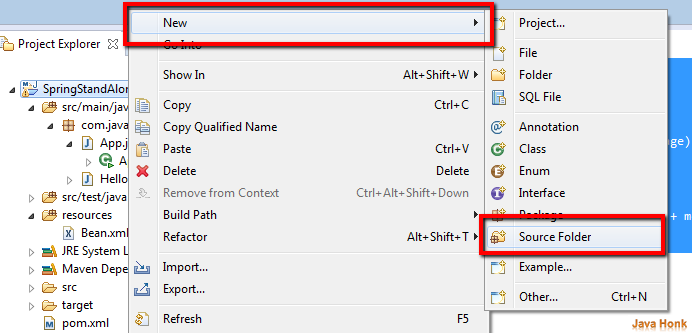
- Now create source folder name resources inside project. Right click on project –> Click New –> Choose Source Folder and create folder name resources
- resources folder automatically will be added to java classpath and we need bean.xml file available at runtime to load. Now create Bean.xml file inside resources folder and copy paste below code in it;
<?xml version="1.0" encoding="UTF-8"?>

<beans xmlns="http://www.springframework.org/schema/beans"
    xmlns:xsi="http://www.w3.org/2001/XMLSchema-instance"
    xsi:schemaLocation="http://www.springframework.org/schema/beans
    http://www.springframework.org/schema/beans/spring-beans-3.0.xsd">

   <bean id="helloWorld" class="com.javahonk.HelloWorldBean">
       <property name="message" value="Hello World!"/>
   </bean>

</beans>
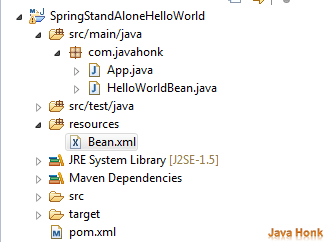
- We are ready now. Final project structure will look as below:
- To run project: Right click App.java class –> Run As –> Java Application you will see below Hello World! message on console:
- That’s it
![]() Download project: SpringStandAloneHelloWorld
Download project: SpringStandAloneHelloWorld
