Create JAX-WX web service client
There are so many ways to generate java client from WSDL. This demo will show you how to generate client class from wsdl using eclipse and test its functionality:
Below are need to build JAX-WS CXF web service:
- Eclipse 3.2 or above (Download eclipse from here) — We are using Eclipse Kepler for this demo
- JDK 1.6 or above (Download from here)
- Tomcat 6 or above (Please follow link to install and configure tomcat in eclipse: Configure and Run Tomcat server in eclipse)
- Apache CXF run time download from here
Step 1: Set up CXF run time environment using this tutorial
Step 2: Create dynamic web project name JAXWSClientFromWSDL in eclipse (If you are not sure how to create dynamic project in eclipse please use this link)
Please note: Latest version of JAX-WS supports Dynamic Web Module v2.5 and up. It does not supports java project.
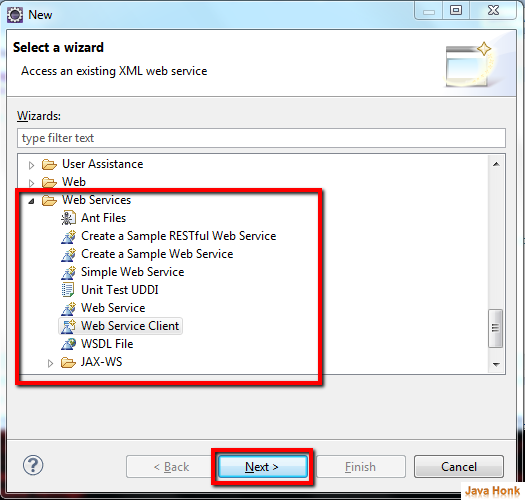
Step 3: To create web service client right click project –> New –> Other –> Web Services –> Web Service Client — Next
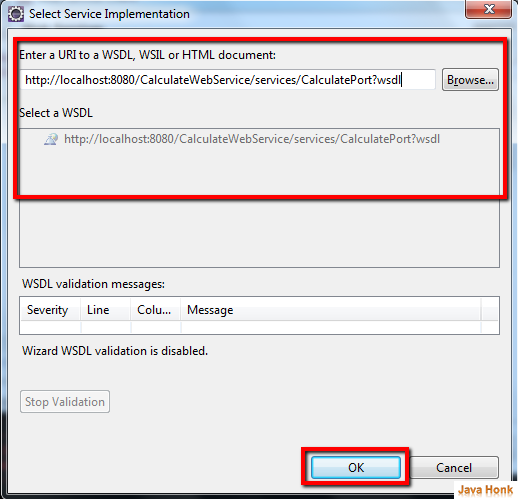
Step 4: On service definition window click browse and enter WSDL URL (If you don’t have any WSDL URL to test please read this tutorial to create web service quickly and get WSDL URL) . We are using same tutorial to create WSDL for our test:
Enter WSDL URL click OK
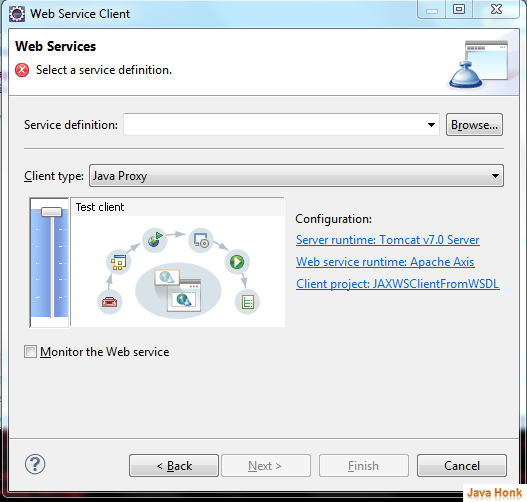
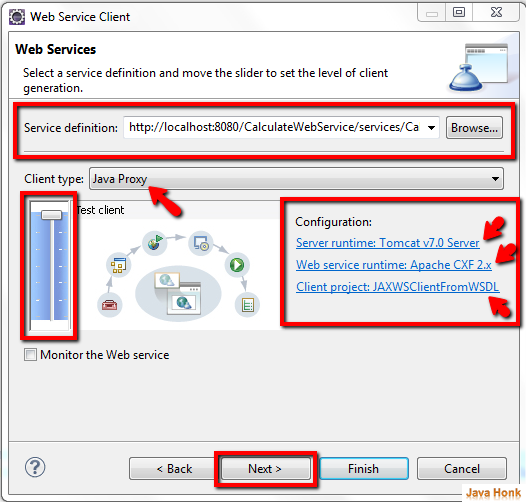
Step 5: On web services window please select as below:
- Service definition: WSDL URL
- Client type: Java Proxy
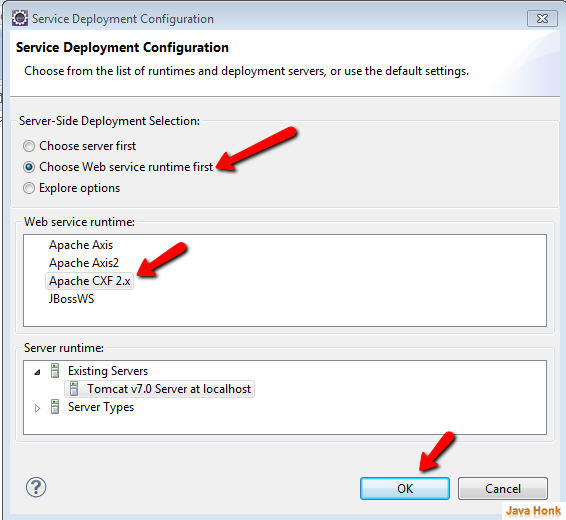
- Web Service runtime: Click and choose Apache CXF 2.x then click OK ( Note we already set up CXF run time in step 1 –> This is very important otherwise you will get error)
Client project: Leave it default selected that is our project JAXWSClientFromWSDL
Step 6: Move service slider on the top to create test client then click Next
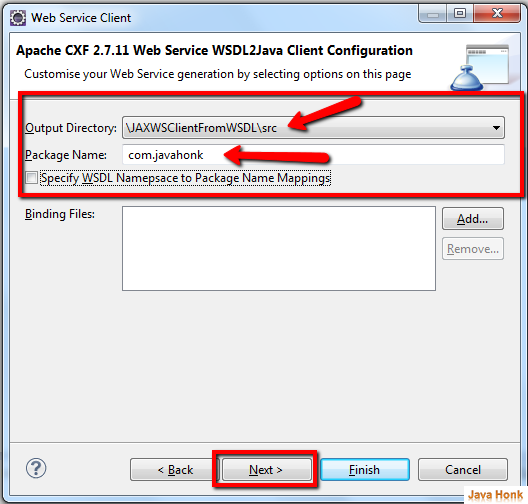
Step 7: Next window choose Output directory src and package name com.javahonk to generate proxy client classes and click Next:
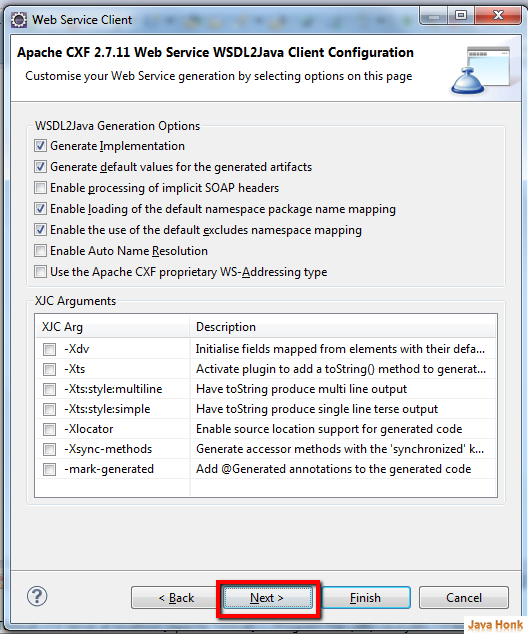
Step 8: In this leave all default selected as shown below and click Next
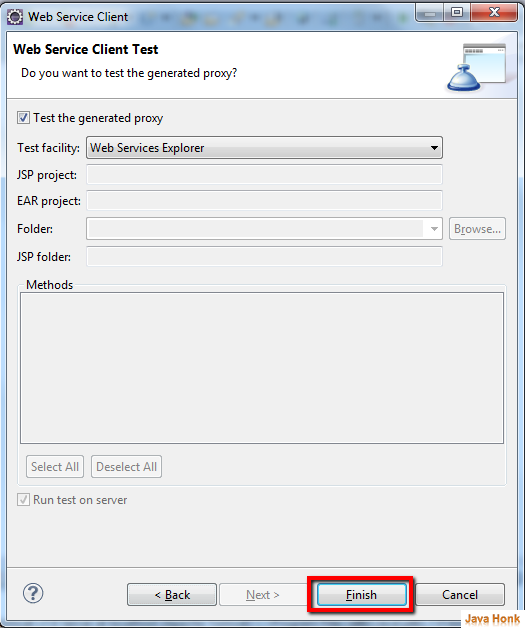
Step 9: We will test our client using both java and Web Service explorer leave all default select to open service explorer click Finish button:
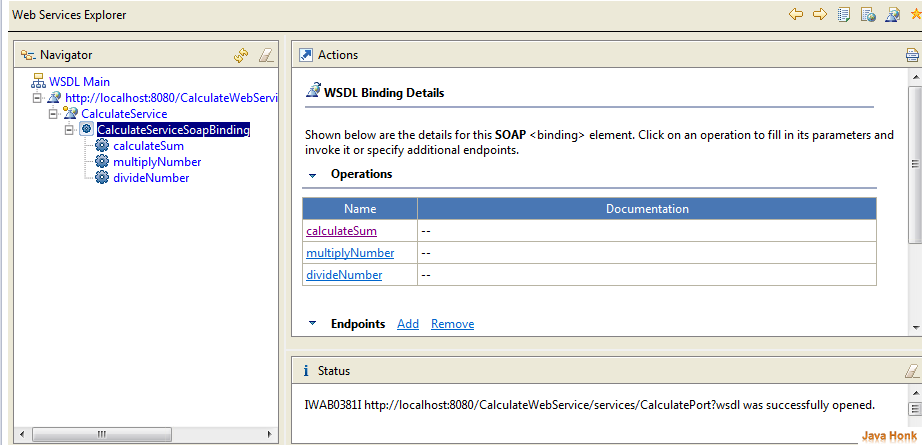
Step 10: After click finish button all proxy class should be generated inside com.javahonk package that we will check on later step. In this step when you clicked finish button it opens Web Service explorer window to test web service shown below:
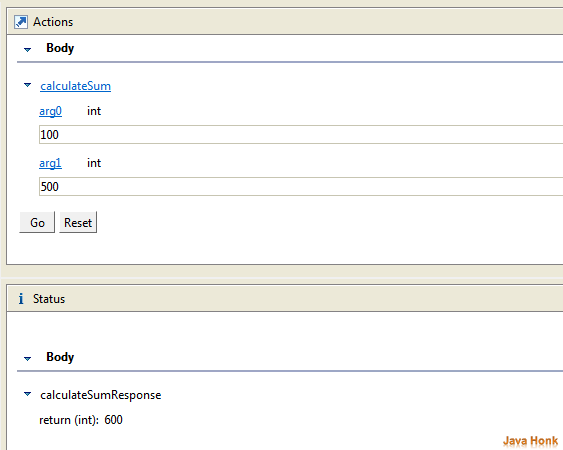
Step 11: For example to calculate sum of two number click calculateSum this will open input window enter number in input field then press Go:
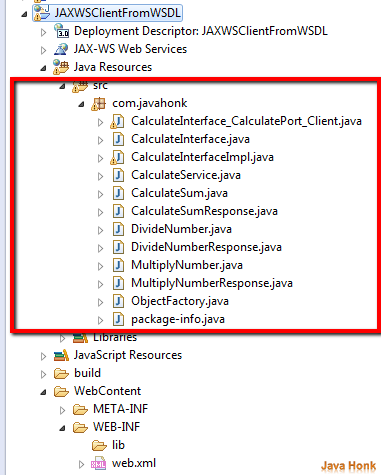
Step 12: Now let’s create java client to test web service. Please see below proxy classes created by JAX-WS:
Step 13: Create java class name: CalculatorClient.java inside com.javahonk.test package and copy past below code
package com.javahonk.test;

import com.javahonk.CalculateInterface;
import com.javahonk.CalculateService;

public class CalculatorClient {
    public static void main(String[] args) {

    try {

        System.out.println("Retrieving the port");
        CalculateService service = new CalculateService();
        CalculateInterface calculateInterface = service.
            getCalculatePort();

        System.out.println("Invoking the calculateSum operation"
            + " on calculate Service");
        Integer response = calculateInterface.calculateSum(2, 200);
        System.out.println("Sum of 2 and 200 is: " + response);

        System.out.println("Invoking the multiplyNumber operation"
            + " on calculate Service");
        response = calculateInterface.multiplyNumber(4,4);
        System.out.println("Multiplication of 4 and 4 is: "
            + response);

        System.out.println("Invoking the divideNumber operation"
            + " on calculate Service");
        response = calculateInterface.divideNumber(100,10);
        System.out.println("Division of 100 and 10 is: "
            + response);

    } catch (Exception e) {
        e.printStackTrace();
    }
    }

}
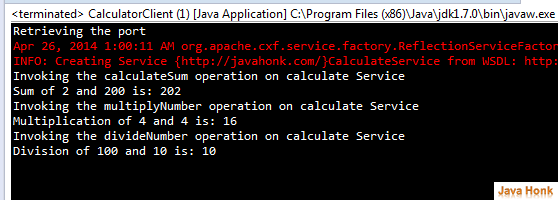
Step 14: To run CalculatorClient right click class –> Run As –> Java Application you will see below output on console:
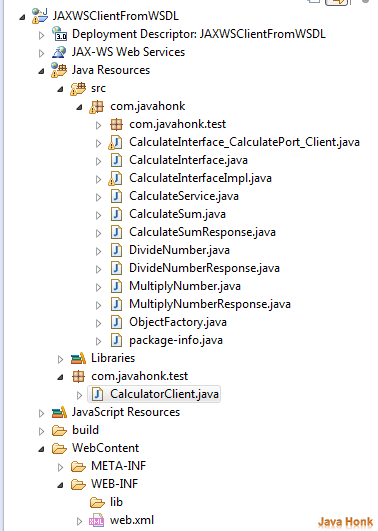
 Step 15: Final project structure:
That’s it create JAX-WX web service client completed.

I followed this tutorial. But i can’t get the java files from the wsdl. And also i m not get any exception.
Actually my output package is empty when i m finishing the web service client creation.
Great post. It worked for me, and I like the step by step explanation … thanks