EJB 2 Hello World JBoss
In this demo you will see how to create EJB 2 Hello World using JBoss application server. Please follow below steps:
Below are needed:
- JBoss Application Sever 5.1 community version
- Eclipse 3.2 or above (In this Kepler has been used)
Steps:
- Create EJB project name: EJB2HelloWorld in eclise. To create project click File –> New –> Other –> EJB –> EJBProject (Please note: when you are creating project you will have to choose Target run time: JBoss 5.1 and EJB module version 2.0)
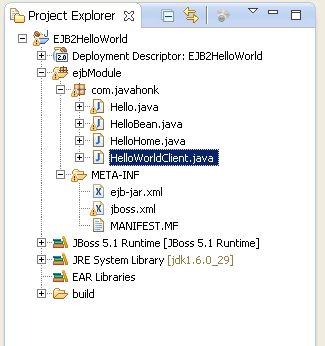
- Final project structure
- ejb-jar.xml:
<?xml version="1.0"?>

<!DOCTYPE ejb-jar PUBLIC
'-//Sun Microsystems, Inc.//DTD Enterprise JavaBeans 2.0//EN'
'http://java.sun.com/dtd/ejb-jar_2_0.dtd'>

<ejb-jar>
	<enterprise-beans>
		<session>
			<ejb-name>hello</ejb-name>
			<home>com.javahonk.HelloHome</home>
			<remote>com.javahonk.Hello</remote>
			<ejb-class>com.javahonk.HelloBean</ejb-class>
			<session-type>Stateless</session-type>
			<transaction-type>Container</transaction-type>
		</session>
	</enterprise-beans>

	<assembly-descriptor>
		<container-transaction>
			<method>
				<ejb-name>hello</ejb-name>
				<method-name>*</method-name>
			</method>
			<trans-attribute>Required</trans-attribute>
		</container-transaction>
	</assembly-descriptor>

</ejb-jar>
- jboss.xml:
<?xml version="1.0" encoding="UTF-8"?>
<jboss>
	<enterprise-beans>
		<session>
			<ejb-name>hello</ejb-name>
			<jndi-name>JNDIName_hello</jndi-name>
		</session>
	</enterprise-beans>
</jboss>
- Hello.java:
package com.javahonk;

import java.rmi.RemoteException;

import javax.ejb.EJBObject;

public interface Hello extends EJBObject {

	public String getHelloWorld() throws RemoteException;


}- HelloBean.java
package com.javahonk;
import javax.ejb.SessionBean;
import javax.ejb.SessionContext;

public class HelloBean implements SessionBean {

	public String getHelloWorld(){
		return "EJB 2 Hello World!!!";

	}

	public void ejbCreate() {
		System.out.println("calling ejbcreate....");
	}

	public void ejbRemove() {
		System.out.println("calling ejbremove");
	}

	public void ejbActivate() {
		System.out.println("calling ejbactivate");
	}

	public void ejbPassivate() {
		System.out.println("calling ejbpassivate");
	}

	public void setSessionContext(SessionContext sc) {
		System.out.println("calling session context");
	}

}- HelloHome.java
package com.javahonk;
import javax.ejb.*;
import java.rmi.*;


public interface HelloHome extends EJBHome {
	public Hello create() throws RemoteException, CreateException;
}- HelloWorldClient.java
package com.javahonk;
import java.util.*;
import javax.naming.InitialContext;
import javax.naming.Context;

public class HelloWorldClient {
	public static void main(String args[]) {

		try {

			Properties p = new Properties();
			p.put(Context.INITIAL_CONTEXT_FACTORY,
					"org.jnp.interfaces.NamingContextFactory");
			p.put(Context.URL_PKG_PREFIXES,
					"org.jboss.naming:org.jnp.interfaces");
			p.put(Context.PROVIDER_URL, "localhost");
			InitialContext ctx = new InitialContext(p);

			HelloHome home = (HelloHome) ctx.lookup("JNDIName_hello");

			Hello bean = home.create();
			System.out.println(bean.getHelloWorld());

		} catch (Exception e) {
			System.out.println(e);
		}
	}
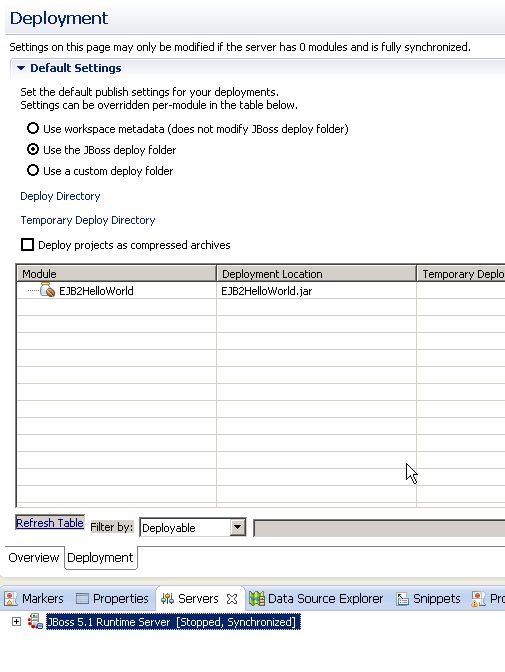
}- Now to run this application you will have to configure JBoss in eclipse and if you are not sure how to do it please use this tutorial. Once you are done with configure with JBoss double click to open it sever configuration and choose use the JBoss deploy foder as below:
- We have done this to validate if EJB2HelloWorld deploy on deploy folder or not. Now right click JBoss server –> Add and Remove –> Add EJBW2HelloWorld project then click OK
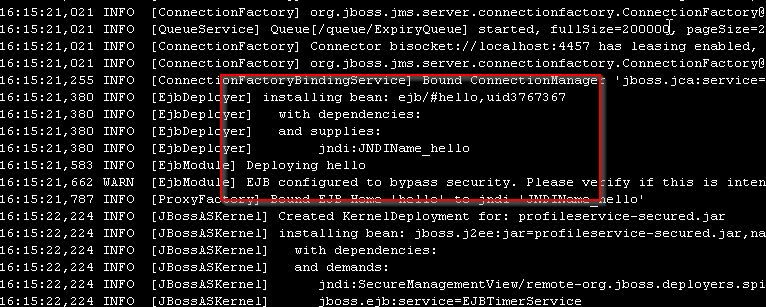
- Now right click –> Start to start the JBoss server. Once server is started please search below on console:
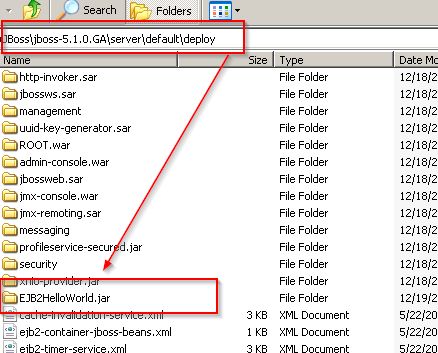
- Now validate if jar file is deployed or not as below:
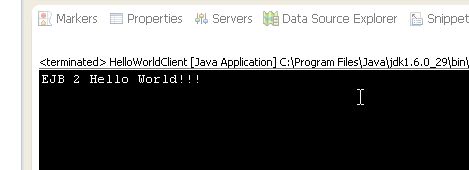
- Everything seems good. Now let’s run the client. Right click HelloWorldClient.java –> Run As –> Java Application you will below on console:
- That’s it for more information on EJB 2 please visit this link
![]() Download Project: EJB2HelloWorld
Download Project: EJB2HelloWorld
