How to deploy war file on weblogic server
This demo will show you how to deploy war file on weblogic server.
Below are needed:
- Weblogic server (For demo we are using version 11gR1(10.3.6)
- Configured server startup bat file or through eclipse
- War file (For test sample war file is attached in the bottom for download)
Step 1: Start your server
Step 2: Open IE or Chrome or Firefox browser whatever you use
Step 3: Go to console log in screen (http://localhost:7001/console/). Default port of weblogic server is 7001 but probably your port can be different. If you using port other than 7001 port then replace local host URL and open your console.
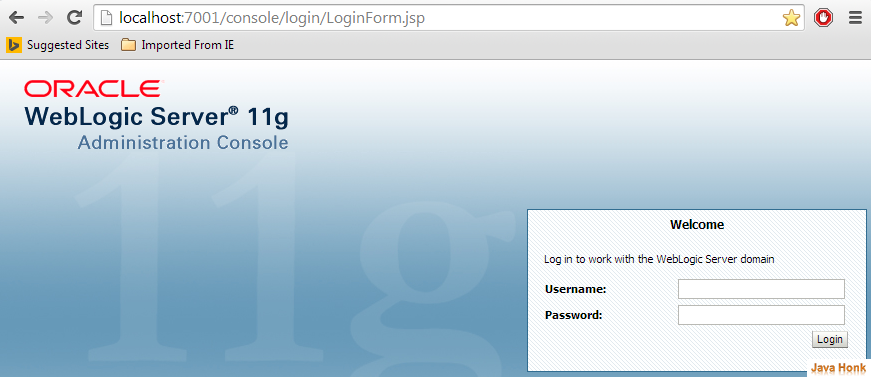
Step 4: Enter your admin id and password then click Log in button
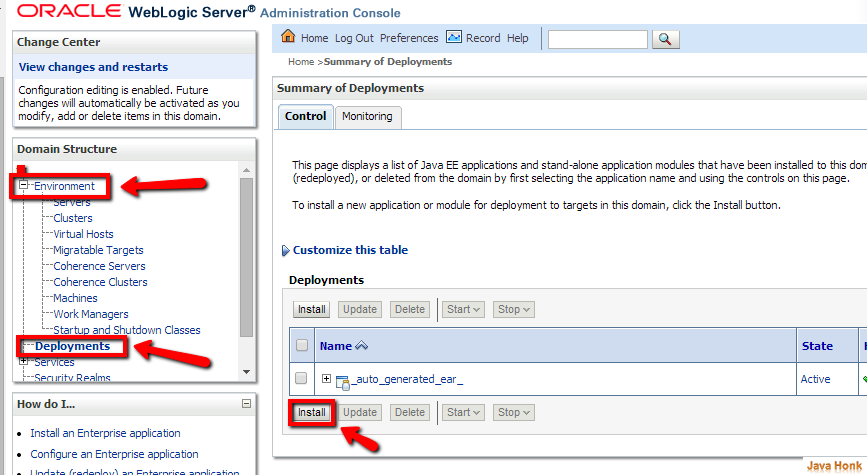
Step 5: On Administration console screen –> Click Environment –> Deployments –> Install
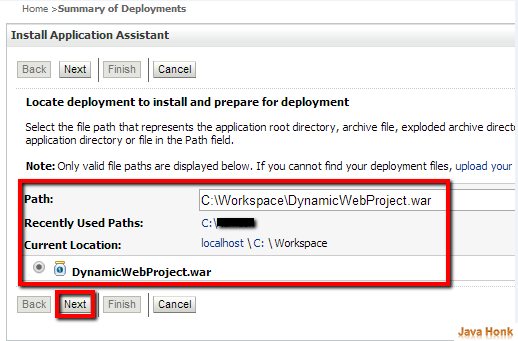
Step 6: On install application window give path of war file and choose war file and click Next (Note: Sample war file attached in the bottom to download for testing purpose)
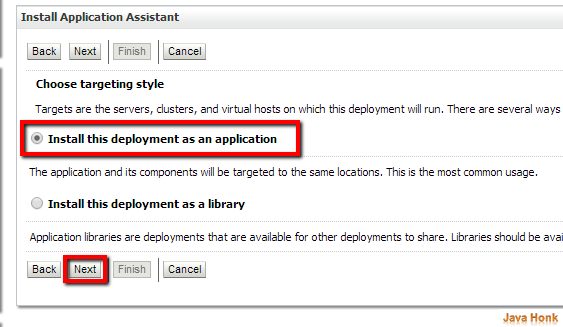
Step 7: Next screen choose install this deployment as an application then click Next:
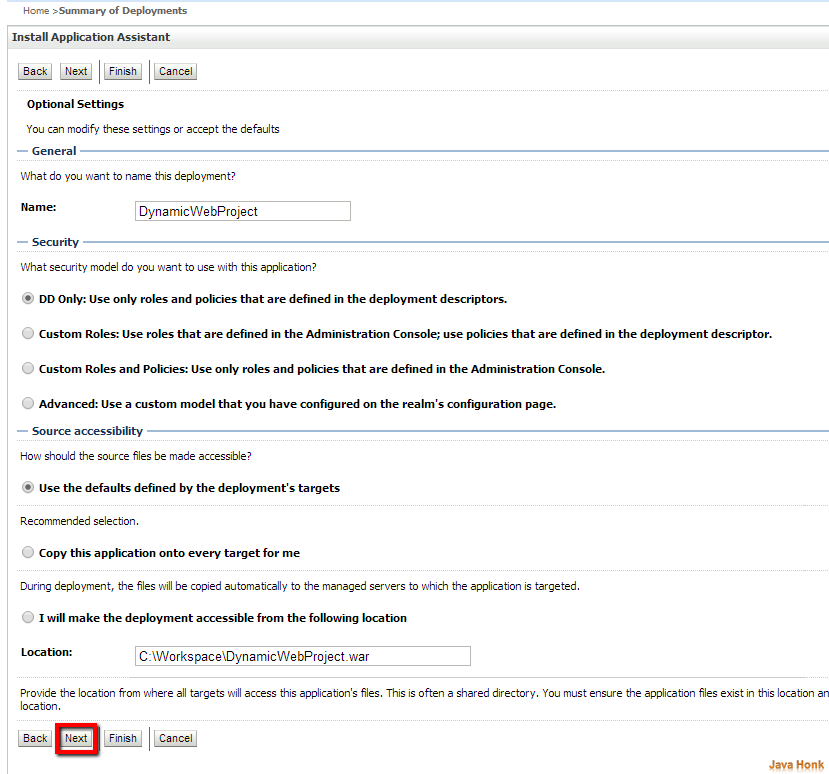
Step 8: Keep everything default selected on next screen shown below and click next
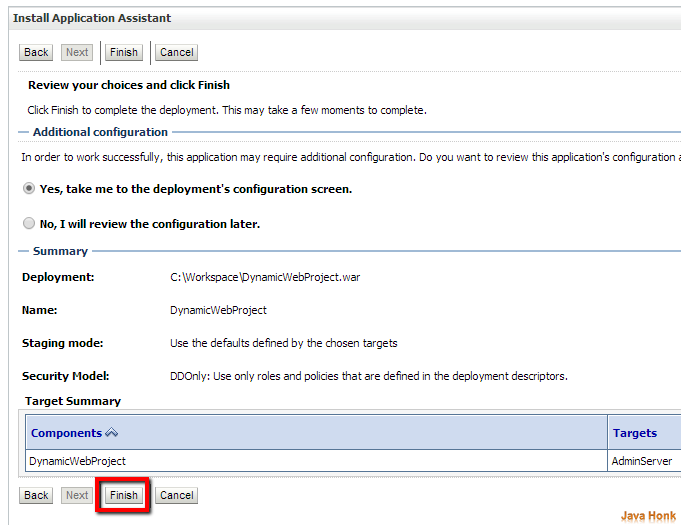
Step 9: Next screen click finish:
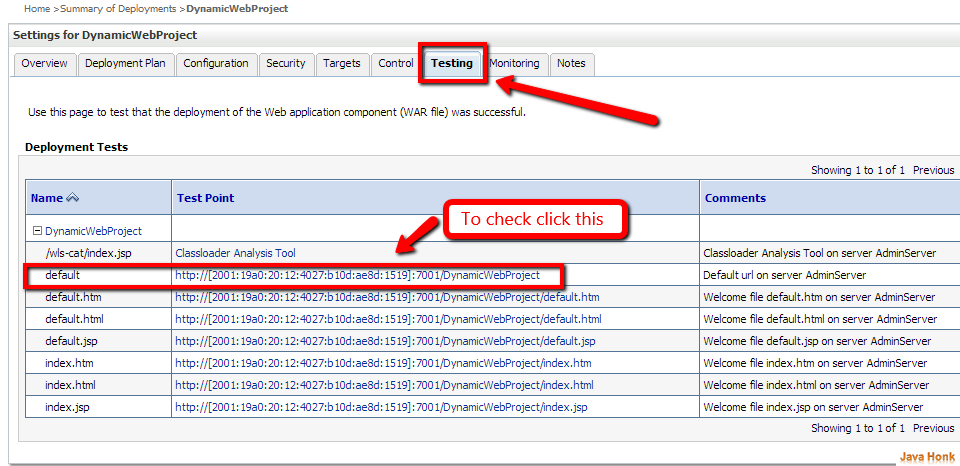
Step 10: On next scree click Testing tab you will see this message “Use this page to test that the deployment of the Web application component (WAR file) was successful.” with below link to test. Click any link that will open Hello world! page.
![]() Download war file : Sample WAR file
Download war file : Sample WAR file
That’s it how to deploy war file on weblogic server completed.


Thank you 🙂
Very good explanation.
Thank You