
Install Add Custom Jar Maven Local Repository
Sometime when you are using maven project and want to add your own custom jar or third party jar which is not available in maven repository. This demo you will show you how to add custom jar to maven local repository and finally add its dependency into your project.
Steps:
Create you custom jar or get third party jar ( I assume you already have custom jar) and for this demo we will use CustomeJar.jar and we will install to local repository and its dependency to the project.
Use below command to install CustomJar.jar to local repository through command prompt:
Sample command:
mvn install:install-file -Dfile=jar_file_location -DgroupId=groupId -DartifactId=artifactId -Dversion={version} -Dpackaging=jarActual command:
mvn install:install-file -Dfile=C:\JavaHonk\CustomJar.jar -DgroupId=CustomJar -DartifactId=CustomJar -Dversion=1.0 -Dpackaging=jar
Through command prompt with output:
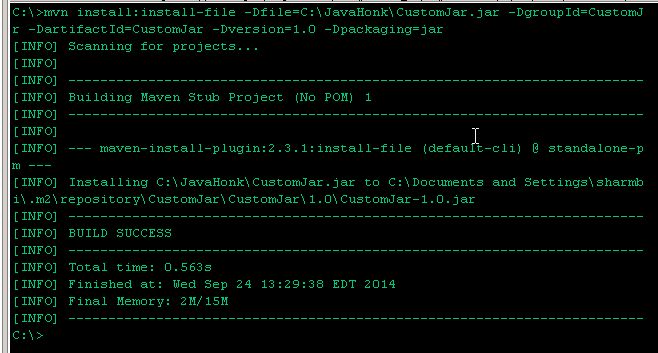
As you could see above we have install CustomJar.jar file to the maven local repository with with version 1.0 and artifact and group id: CustomJar.jar and now we could add this dependency as usual normal way as below:
<dependency>
	<groupId>CustomJar</groupId>
	<artifactId>CustomeJar</artifactId>
	<version>1.0</version>
</dependency>
Please note: Sometimes if you do some configuration change in your project and start getting error “Your custom class jars not found”. Please create another version and include in your project issue will be resolved.
That’s it now you could use CustomJar.jar files in your project.
