Install Sonar Open Platform Manage Code Quality
Sonar is very efficient way to manage code quality. According to its official description, it manages all 7 axes of code quality. This tutorial will cover only installation part and next tutorial we have covered project configuration to see how it checks code quality of the project. Please follow below steps to install it locally:
- Go here and download latest version of SonarQube (In this demo we will install 5.0.1 version)
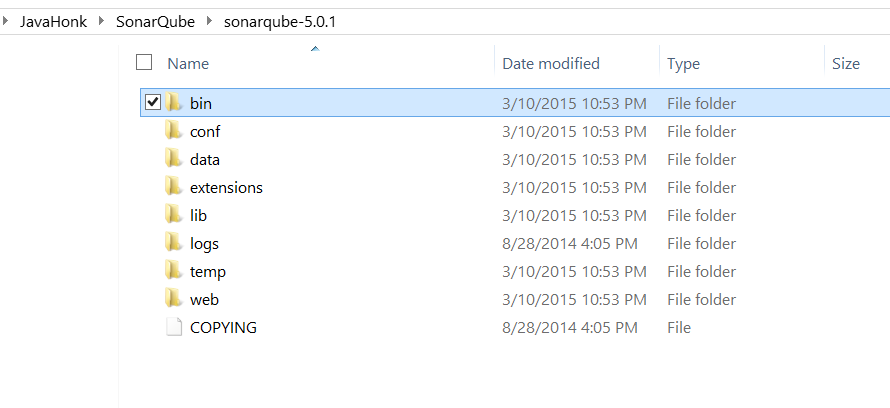
- Once download is done copy to to folder of your choice and unzip it. You will see below folder structure:
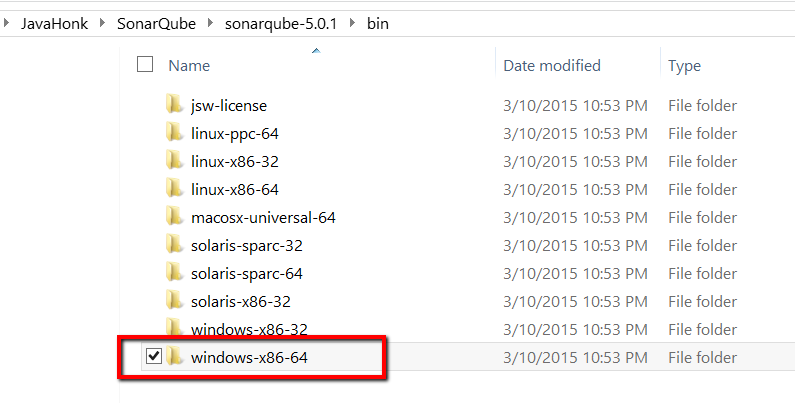
- If you open bin folder you will see below folder structure for all platform and based on your platform you could start Sonar. In this demo we are using Winodw 8.1 64 bit so we will use windows-x86-64 to start sonar:
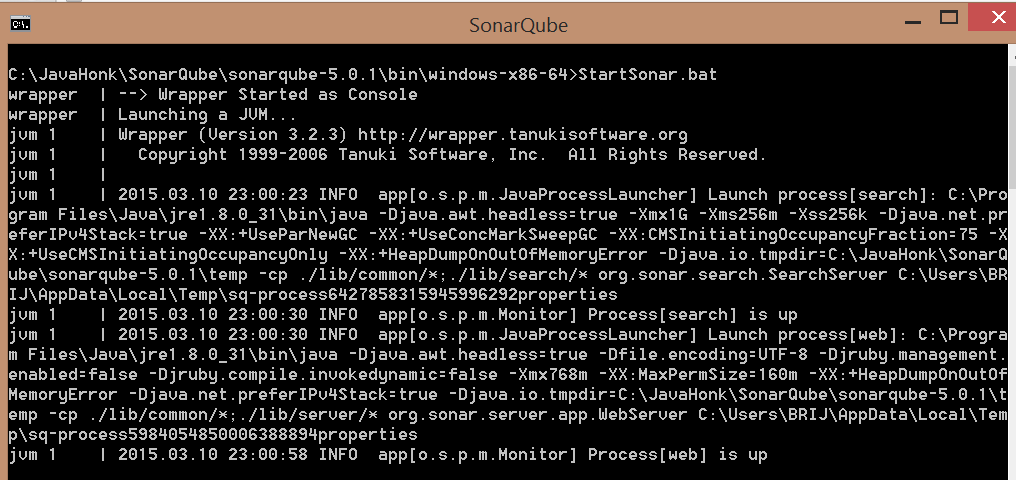
- To start sonar CD to sonarqube-HOME\bin\windows-x86-64 folder and use below command:
- If server started successfully you will see below:
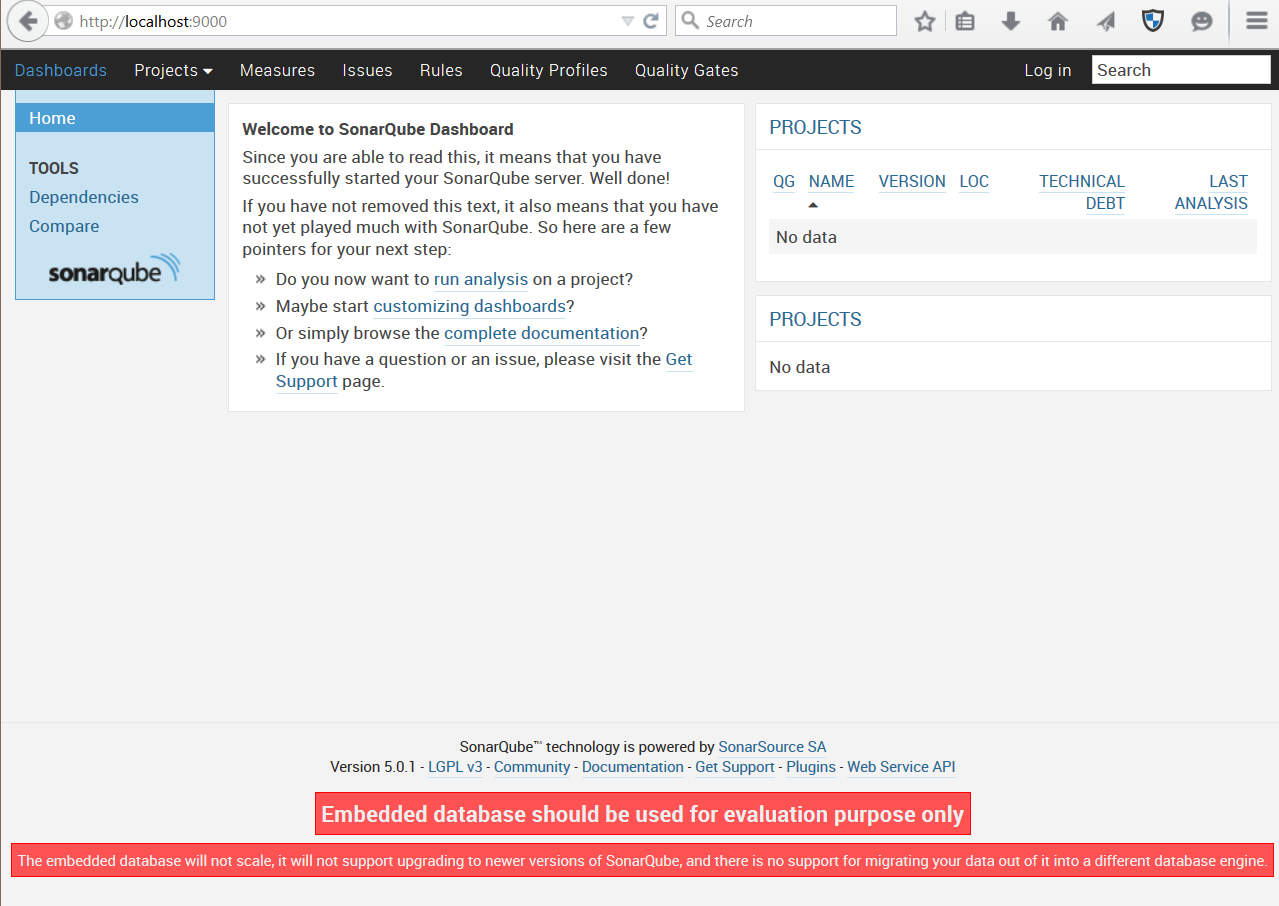
- By default Sonar application will be available on http://localhost:9000/ and it uses Jetty Webserver and has embedded database H2. Go to its default host http://localhost:9000/ you will see below:
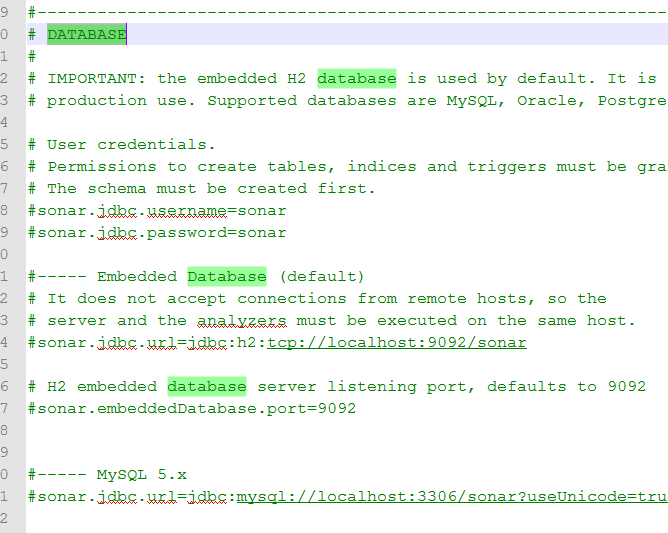
- Configuration change: To change its configuration go to sonarqube_HOME\conf folder and open file sonar.properties. In this file you could change default properties. If you want to change database then search for word “DATABASE” you will see below:
Note: By default it uses embedded H2 database but supported databases are MySQL, Oracle, PostgreSQL and Microsoft SQLServer and you will all are configured commented out by default just you will have change user name, password and JDBC URL.
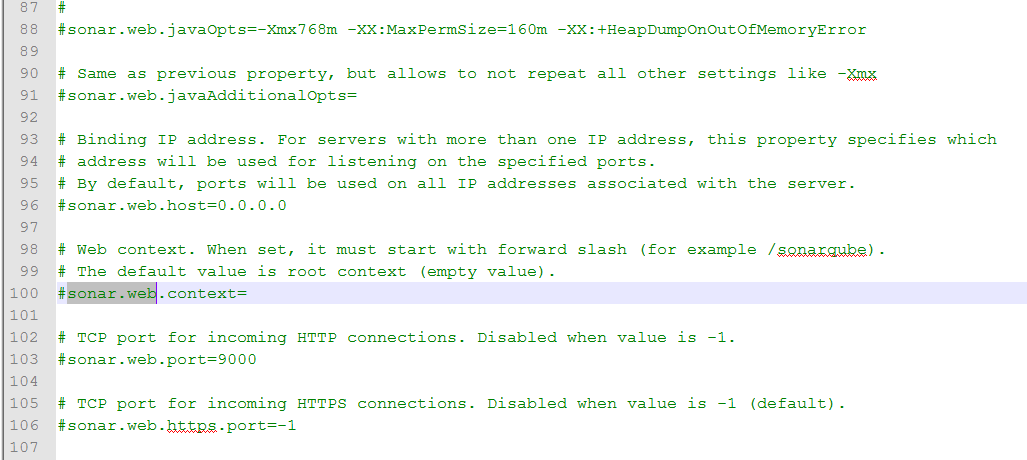
- To change its default port search for word “sonar.web” you will see below where you could change host, port and context:
- To log in to the console you could use default administrator log in id and password admin/admin

