Install SVN Eclipse step
If your project is using SVN as version control of the source code and you want to work with repository directly with the eclipse then you will have to install SVN plugin to your eclipse. Below are instruction how to install SVN eclipse
- Open your eclipse
- Click Help –> Eclipse Marketplace…
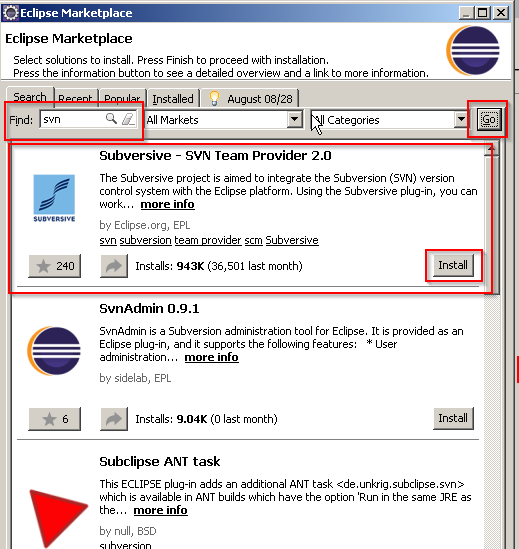
- In Find input box type “svn” and click Go and once you got the result click install:

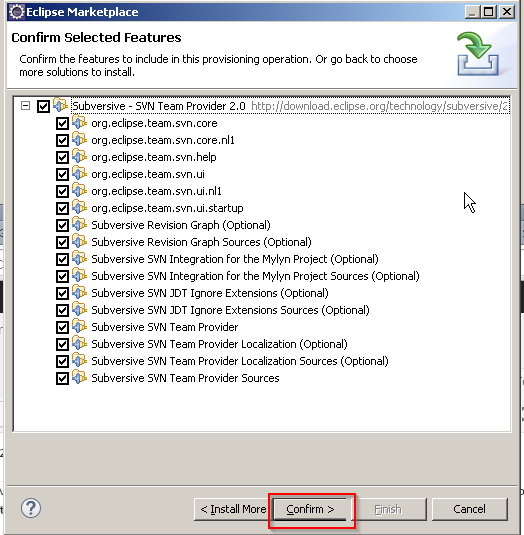
- Choose all –> Click Confirm

- If you get below warning click Yes because SVN Team Provider is optional

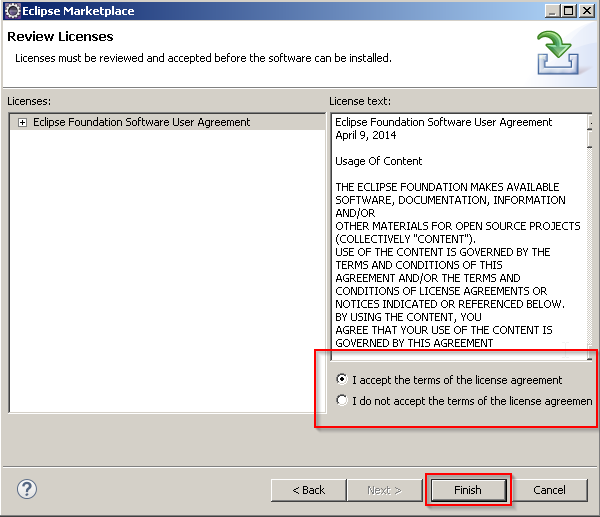
- Choose accept terms and click Finish

- Once installation done you will see below to restart your eclipse for the changes to take effect please click Yes.
Install SVN Connector:
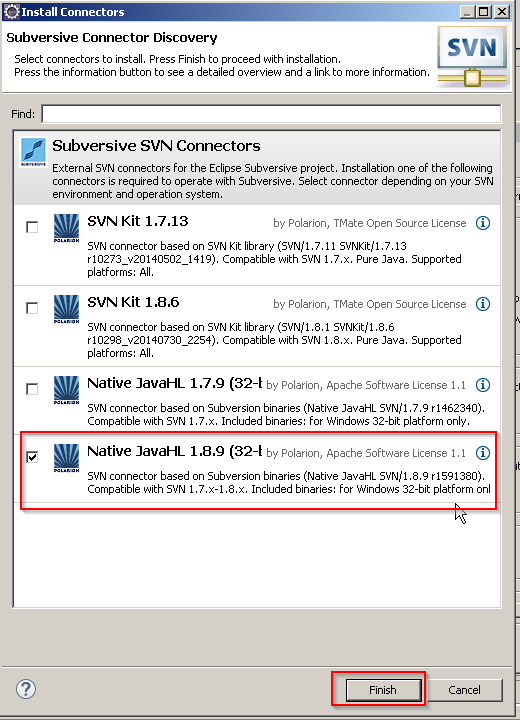
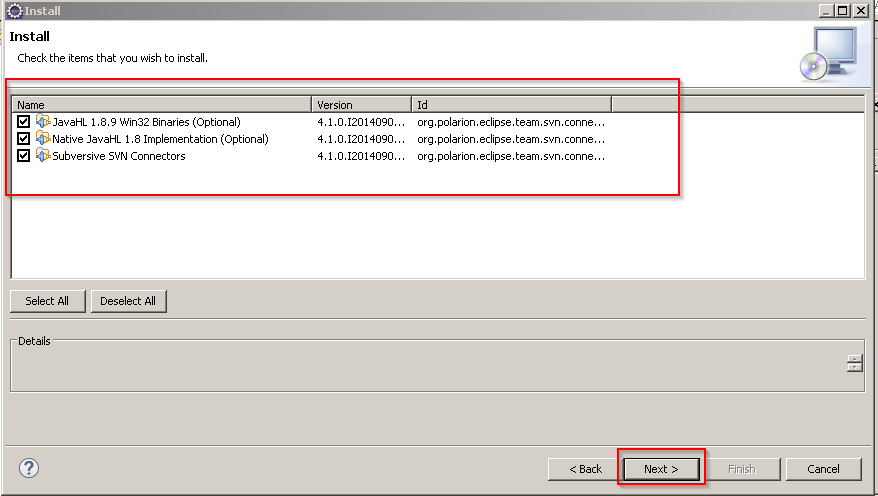
- To install SVN connector. Go to Window –> Preferences –> Team –> SVN. You will see below. (Please note: this option shows only once first time when you click SVN and next time you won’t see below. Somehow if you didn’t install please refer option 2 below to install again). Please choose Native JavaHL option as shown below and click Finish:
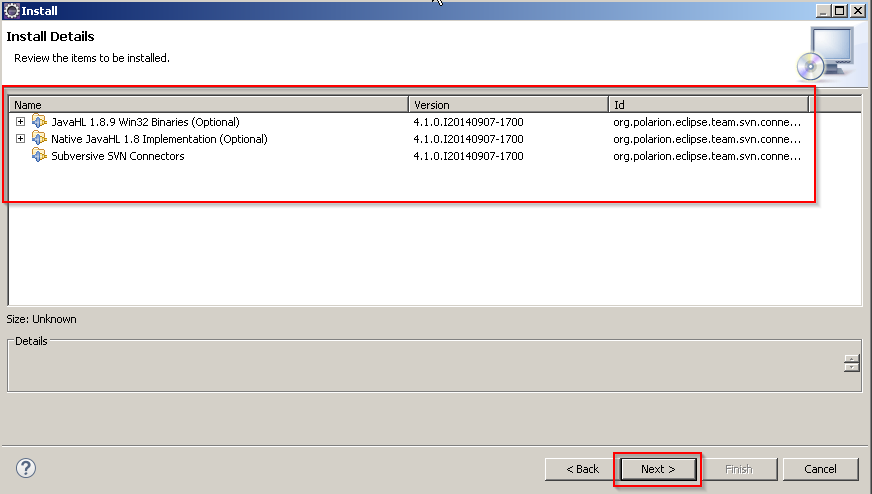
- Next window click next:
- Next window click next:
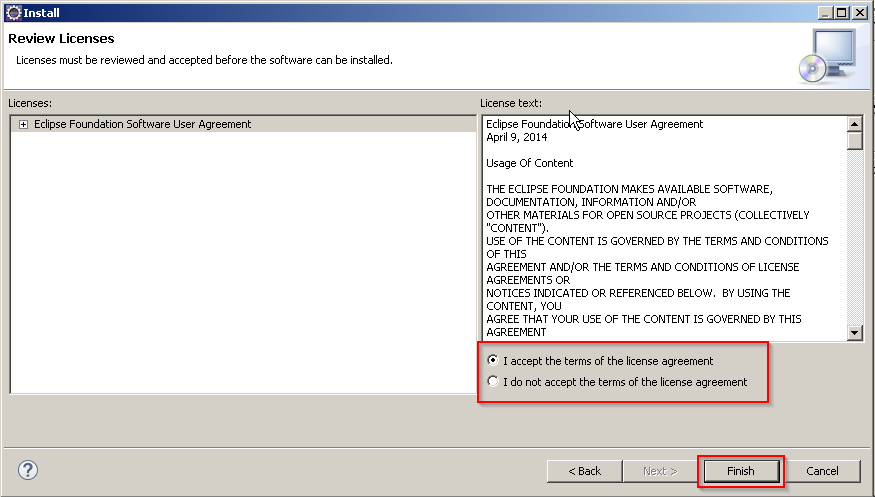
- Next window click Accept agreement:
- Next window you will warning please click OK:
- Once your installation is done you see below to restart your eclipse please click Yes:
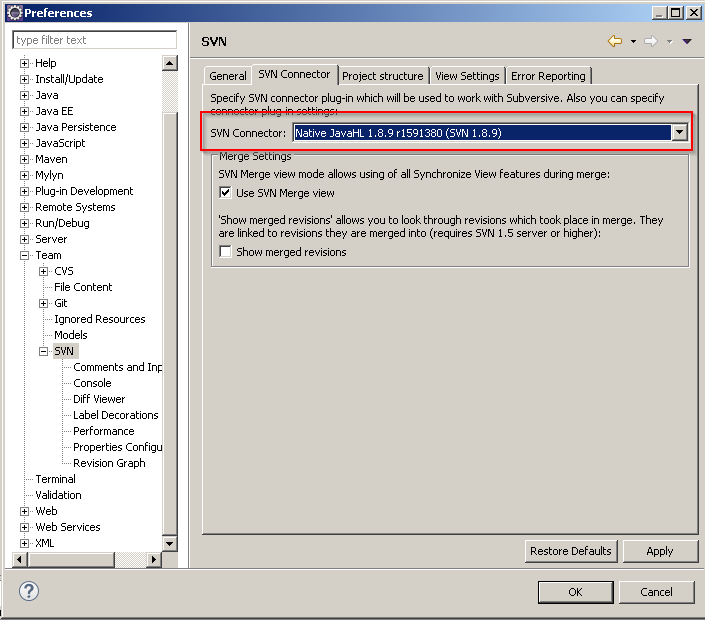
- Now to verify SVN connector please click Window –> Preferences –> Team –> SVN. You will see below connector.
- That’s it.
Option 2: If you couldn’t install SVN connector first time then please follow below step for installation:
- Click Help –> Install new software
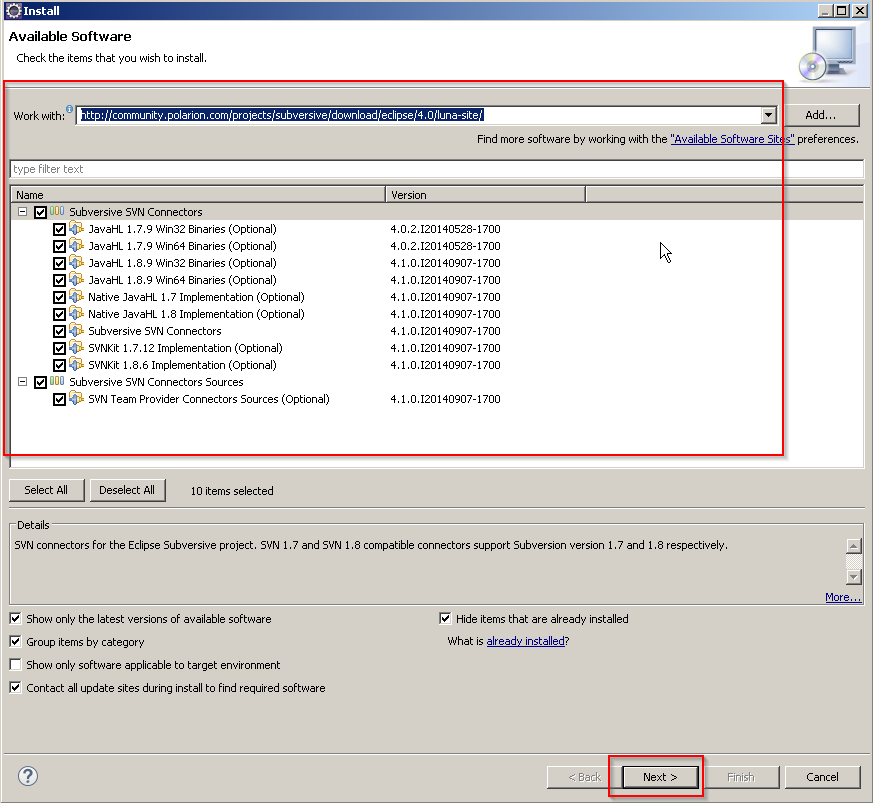
- Go to http://www.polarion.com/products/svn/subversive/download.php copy appropriate link based on eclipse version and paste as shown below:
- Once all installed please restart your eclipse
- Now in your eclipse click Window –> Preferences –> Team –> SVN. Choose appropriate connector to connect the SVN:
- That’s it.
For more information please visit SVN site here
