JSF Hello World
JSF provides an easy framework for creating a web application. Developing a simple JSF application
typically requires the following:
- Developing managed beans
- Creating web pages using component tags
- Mapping the javax.faces.webapp.FacesServlet instance
You need following to create JSF Hello World application:
- Eclipse 3.0 or above (Download eclipse from http://www.eclipse.org/downloads/ site)
- JDK 1.6 or above (Download from here: http://www.oracle.com/technetwork/java/javase/downloads/index.html)
- Tomcat 6 or above (Please follow link to install and configure tomcat in eclipse:Configure and Run Tomcat server in eclipse
- JSF jars which is already included in project for download in the bottom
Below are the steps:
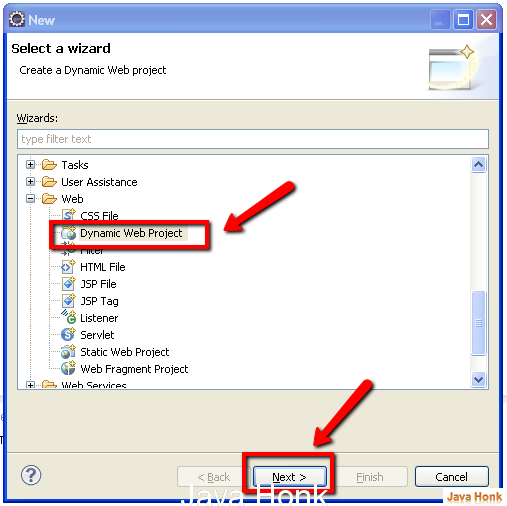
- Open your eclipse click File –> New –>Other — Web and choose Dynamic Web Project
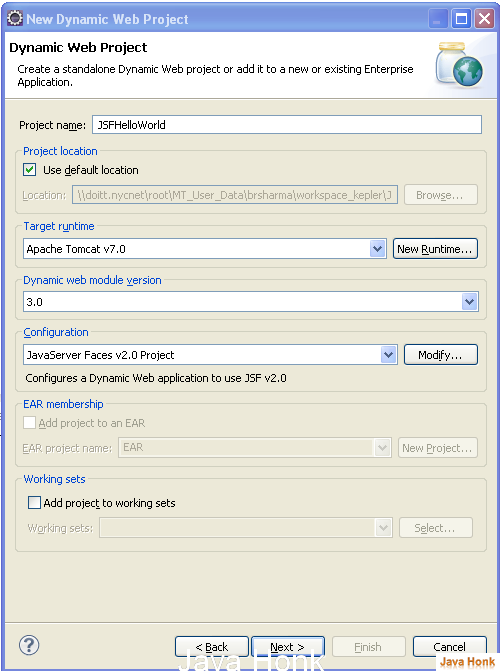
- Below are details:
- Project name: JSFHelloWorld
- Project location: Use default location
- Target runtime: Apache Tomcat (If didn’t configure tomcat yet in eclipse yet please user this link: Configure and Run Tomcat server in eclipse
- Dynamic web module version: 3.0
- Configuration: Please choose JavaServer Faces v2.0 Project from drop down
- ClickNext
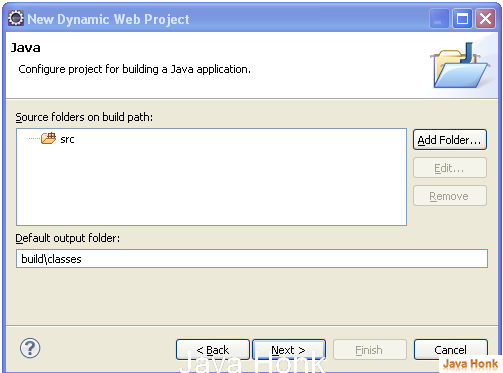
- Click Next on below screen
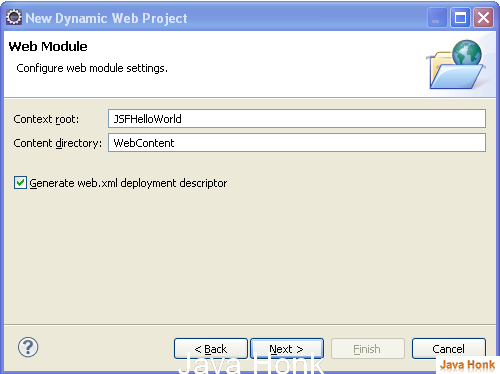
- Keep all value default and check box Generate web.xml deployment descriptor and click Next
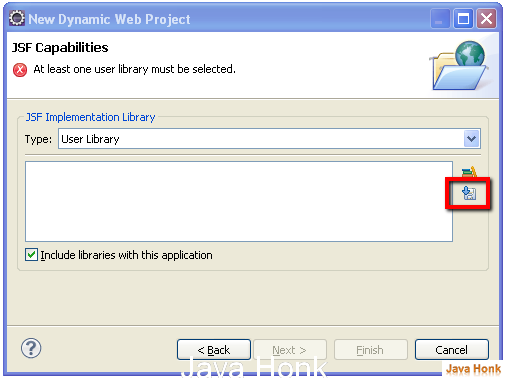
- On below next window click download library
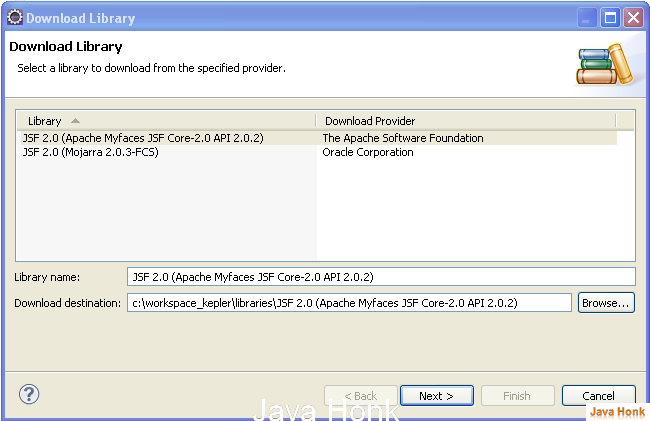
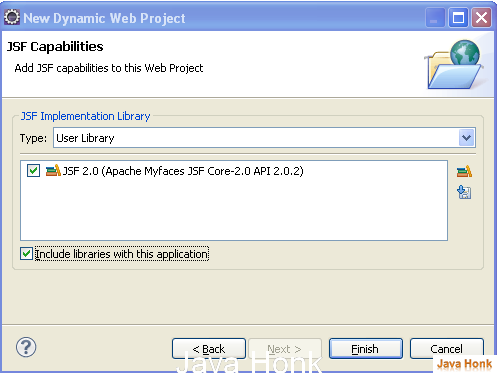
- Next window select JSF 2.0 (Apache Myfaces) and keep all value checked default –> Click Next
- Check Accept — Click Finish once complete choose below and click Finish
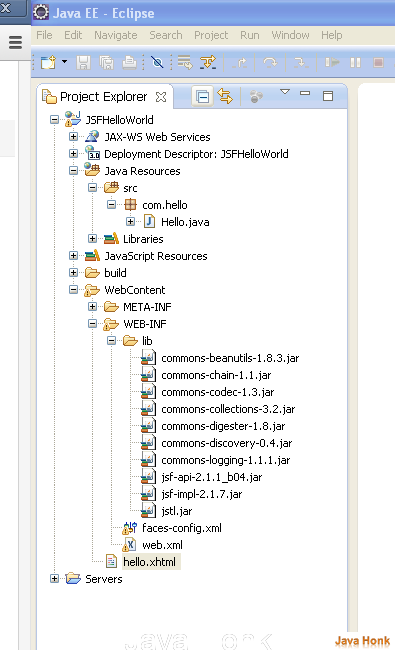
- Now you should see project name : JSFHelloWorld in your eclipse. Please create package name: com.hello inside src folder.
- Create class name: Hello.java and copy paste below content in it:
package com.hello;

import javax.faces.bean.ManagedBean;

@ManagedBean
public class Hello {

    final String world = "Hello World!";

    public String getworld() {
        return world;
    }
}
- Replace web.xml content with below content:
<?xml version="1.0" encoding="UTF-8"?>
<web-app xmlns:xsi="http://www.w3.org/2001/XMLSchema-instance" xmlns="http://java.sun.com/xml/ns/javaee" xsi:schemaLocation="http://java.sun.com/xml/ns/javaee http://java.sun.com/xml/ns/javaee/web-app_3_0.xsd" id="WebApp_ID" version="3.0">
  <display-name>JSFHelloWorld</display-name>
  <welcome-file-list>
    <welcome-file>hello.faces</welcome-file>
  </welcome-file-list>
  <servlet>
    <servlet-name>Faces Servlet</servlet-name>
    <servlet-class>javax.faces.webapp.FacesServlet</servlet-class>
    <load-on-startup>1</load-on-startup>
  </servlet>
  <servlet-mapping>
    <servlet-name>Faces Servlet</servlet-name>
    <url-pattern>*.faces</url-pattern>
  </servlet-mapping>
</web-app>
- Create hello.xhtml inside WebContent folder and copy paste below content:
<html lang="en"
      xmlns="http://www.w3.org/1999/xhtml"
      xmlns:h="http://java.sun.com/jsf/html">
    <h:head>
        <title>JSF Hello World</title>
    </h:head>
    <h:body>
        #{hello.world}
    </h:body>
</html>
- Download project and copy all jar files inside your lib folder
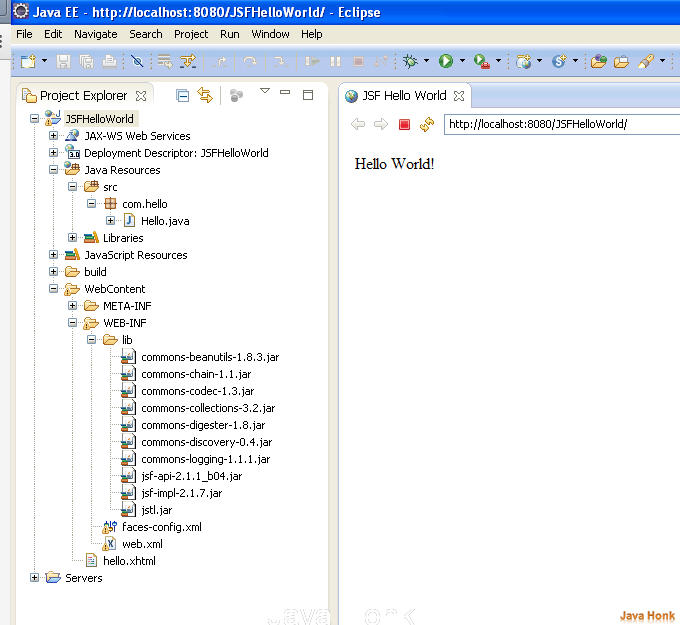
- Finally your folder structure should look like below
- Now right click project –> Run As –> Run on Server. You should see below Hello World result:
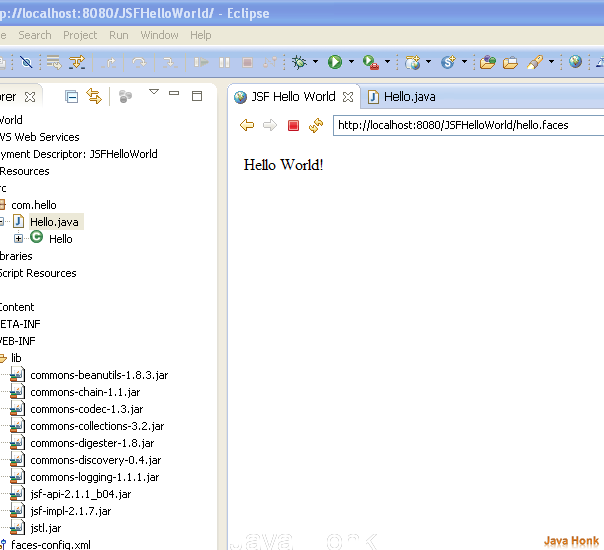
- You could also use below screen URL to call managed bean directly to get result:
- That’s it.
Note: If you download project code from below and import in your eclipse could see some exception, if you are using different version of JDK, ECLIPSE and Web server. Please use below link to sort out any issues:
- Target runtime Apache Tomcat is not defined
- Unbound Classpath container
- java.lang.UnsupportedClassVersionError
- Java Compiler Level not match Java Project facet
![]() Download JSF Hello World Project
Download JSF Hello World Project
