Spring MVC Add Multiple Rows
How to add multiple rows spring MVC from jsp
There are so many ways you could add multiple rows on jsp and populate data on controller.This tutorial Spring MVC add multiple rows one way to achieve it. Please follow below steps:
Below are needed to add dynamically rows from jsp
- Eclipse 3.0 or above (Download eclipse from http://www.eclipse.org/downloads/)
- JDK 1.6 or above (Download from here: JDK 1.6)
- Tomcat 6 or above (Please follow link to install and configure tomcat in eclipse: Configure and Run Tomcat server in eclipse
- Spring jars which is already included in project for download in the bottom
Please follow below steps:
- Create dynamic web project in eclipse name: SpringMVCProject (Please use this link if you are not familiar how to create dynamic project in eclipse: Create Dynamic Web Project Eclipse)
- Create package com.javahorn.beans inside src folder and create two classes inside it with same name from below:
OperationParameters.java
package com.javahorn.beans;

public class OperationParameters {

	private String name;

	public String getName() {
		return name;
	}

	public void setName(String name) {
		this.name = name;
	}

}
- Users.java
package com.javahorn.beans;

import java.util.ArrayList;
import java.util.List;

import org.apache.commons.collections.FactoryUtils;
import org.apache.commons.collections.list.LazyList;

public class Users {

	private String name;
	private String dob;
	private String email;
	private String phone;
	private List<OperationParameters> operationParameterses = LazyList.decorate(new ArrayList<OperationParameters>(),FactoryUtils.instantiateFactory(OperationParameters.class));

	public Users(String name, String dob, String email, String phone,
			String address, Long pincode, String country) {
		super();
		this.name = name;
		this.dob = dob;
		this.email = email;
		this.phone = phone;
	}

	public Users() {
	}

	public String getName() {
		return name;
	}

	public void setName(String name) {
		this.name = name;
	}

	public String getDob() {
		return dob;
	}

	public void setDob(String dob) {
		this.dob = dob;
	}

	public String getEmail() {
		return email;
	}

	public void setEmail(String email) {
		this.email = email;
	}

	public String getPhone() {
		return phone;
	}

	public void setPhone(String phone) {
		this.phone = phone;
	}

	public List<OperationParameters> getOperationParameterses() {
		return operationParameterses;
	}

	public void setOperationParameterses(
			List<OperationParameters> operationParameterses) {
		this.operationParameterses = operationParameterses;
	}

}
- Create class TestController.java inside com.javahorn.controller package
package com.javahorn.controller;

import org.springframework.stereotype.Controller;
import org.springframework.web.bind.annotation.ModelAttribute;
import org.springframework.web.bind.annotation.RequestMapping;
import org.springframework.web.bind.annotation.RequestMethod;
import org.springframework.web.servlet.ModelAndView;

import com.javahorn.beans.Users;

@Controller
public class TestController {

	@RequestMapping(value = "/helloWorld.web", method = RequestMethod.GET)
	public ModelAndView printWelcome(@ModelAttribute("user") Users user) {

		ModelAndView mav = new ModelAndView("lazyRowLoad");
		mav.addObject("message", "Hello World!!!");
		return mav;

	}

	@RequestMapping(value = "/lazyRowAdd.web", method = RequestMethod.POST)
	public ModelAndView lazyRowAdd(@ModelAttribute("user") Users user) {

		Users users=new Users();
		ModelAndView mav = new ModelAndView("lazyRowLoad");
		mav.addObject("users", users);
		return mav;

	}

}
- Create dispatcher-servlet.xml inside WEB-INF folder and copy paste below content
<?xml version="1.0" encoding="UTF-8"?>
<beans xmlns="http://www.springframework.org/schema/beans"
	xmlns:context="http://www.springframework.org/schema/context"
	xmlns:xsi="http://www.w3.org/2001/XMLSchema-instance"
	xsi:schemaLocation="
        http://www.springframework.org/schema/beans
        http://www.springframework.org/schema/beans/spring-beans-3.0.xsd
        http://www.springframework.org/schema/context
        http://www.springframework.org/schema/context/spring-context-3.0.xsd">

	<context:component-scan base-package="com.javahorn.controller" />
	<context:component-scan base-package="com.javahorn.beans" />

	<bean
		class="org.springframework.web.servlet.view.InternalResourceViewResolver">
		<property name="prefix">
			<value>\WEB-INF\jsp\</value>
		</property>
		<property name="suffix">
			<value>.jsp</value>
		</property>
	</bean>

</beans>
- Copy below web.xml content in your file
<?xml version="1.0" encoding="UTF-8"?>
<web-app xmlns:xsi="http://www.w3.org/2001/XMLSchema-instance" xmlns="http://java.sun.com/xml/ns/javaee" xmlns:web="http://java.sun.com/xml/ns/javaee/web-app_2_5.xsd" xsi:schemaLocation="http://java.sun.com/xml/ns/javaee http://java.sun.com/xml/ns/javaee/web-app_2_5.xsd" id="WebApp_ID" version="2.5">
	<servlet>
		<servlet-name>dispatcher</servlet-name>
		<servlet-class>org.springframework.web.servlet.DispatcherServlet</servlet-class>
		<load-on-startup>1</load-on-startup>
	</servlet>

	<servlet-mapping>
		<servlet-name>dispatcher</servlet-name>
		<url-pattern>*.web</url-pattern>
	</servlet-mapping>

	<context-param>
		<param-name>contextConfigLocation</param-name>
		<param-value>/WEB-INF/dispatcher-servlet.xml</param-value>
	</context-param>

	<listener>
		<listener-class>org.springframework.web.context.ContextLoaderListener</listener-class>
	</listener>

	<welcome-file-list>
	   <welcome-file>helloWorld.web</welcome-file>
	</welcome-file-list>

</web-app>
- Create folder name jsp inside WEB-INF folder and create jsp file name lazyRowLoad.jsp. Copy paste below jsp content in it
<%@ taglib prefix="form" uri="http://www.springframework.org/tags/form"%>
<%@ taglib uri="http://java.sun.com/jsp/jstl/core" prefix="c" %>
<%@ page language="java" contentType="text/html; charset=ISO-8859-1"
    pageEncoding="ISO-8859-1"%>
<!DOCTYPE html PUBLIC "-//W3C//DTD HTML 4.01 Transitional//EN" "http://www.w3.org/TR/html4/loose.dtd">
<html>
<head>
<meta http-equiv="Content-Type" content="text/html; charset=ISO-8859-1">
<title>Insert title here</title>
<SCRIPT language="javascript"><!--
        function addRow(tableID) {

            var table = document.getElementById(tableID);

            var rowCount = table.rows.length;
            var row = table.insertRow(rowCount);

            var cell1 = row.insertCell(0);
            var element1 = document.createElement("input");
            element1.type = "checkbox";
            element1.name="chkbox[]";
            cell1.appendChild(element1);

            var cell2 = row.insertCell(1);
            cell2.innerHTML = rowCount + 1;

            var cell3 = row.insertCell(2);
            var element2 = document.createElement("input");
            element2.type = "text";
            var length=(table.rows.length)-1;
            element2.name = "operationParameterses["+length+"].name";
            cell3.appendChild(element2);

        }

        function deleteRow(tableID) {
            try {
            var table = document.getElementById(tableID);
            var rowCount = table.rows.length;

            for(var i=0; i<rowCount; i++) {
                var row = table.rows[i];
                var chkbox = row.cells[0].childNodes[0];
                if(null != chkbox && true == chkbox.checked) {
                    table.deleteRow(i);
                    rowCount--;
                    i--;
                }
            }
            }catch(e) {
                alert(e);
            }
        }

    </SCRIPT>
</head>
<body>

<form:form commandName="user" action="lazyRowAdd.web" method="post">

            <fieldset>
                <legend>User details</legend>
                <ol>
                    <li>
                        <label for=name>Name</label>
                        <form:input path="name"  type="text" placeholder="First and last name" />
                    </li>
                    <li>
                        <label for=name>Date</label>
                    <form:input path="dob" type="date" required="true" />
                    </li>
                    <li>
                        <label for=email>Email</label>
                        <form:input path="email" type="text" required="true" />
                    </li>
                    <li>
                        <label for=phone>Phone</label>
                        <form:input path="phone" type="text" required="true" />
                    </li>

                    <li>
	                    <INPUT type="button" value="Add Row" onclick="addRow('dataTable')" />
					    <INPUT type="button" value="Delete Row" onclick="deleteRow('dataTable')" />
					    <TABLE id="dataTable" width="350px" border="1">
					        <TR>
					            <TD><INPUT type="checkbox" name="chk"/></TD>
					            <TD> 1 </TD>
					            <TD> <INPUT type='text' name = "operationParameterses[0].name"/> </TD>
					        </TR>
					    </TABLE>
                    </li>

                </ol>
                Dynamically data entered below:
                <ol>
                <c:forEach items="${user.operationParameterses}" var="value">
				  <li><c:out value="${value.name}"/></li>
				 </c:forEach>
				</ol>
            </fieldset>
            <fieldset>
                <button type=submit>Save User Details!</button>
            </fieldset>
        </form:form>

</body>
</html>
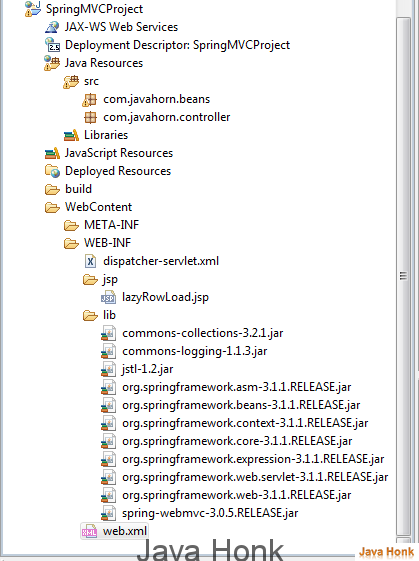
- Finally after all set up you should see below project structure:
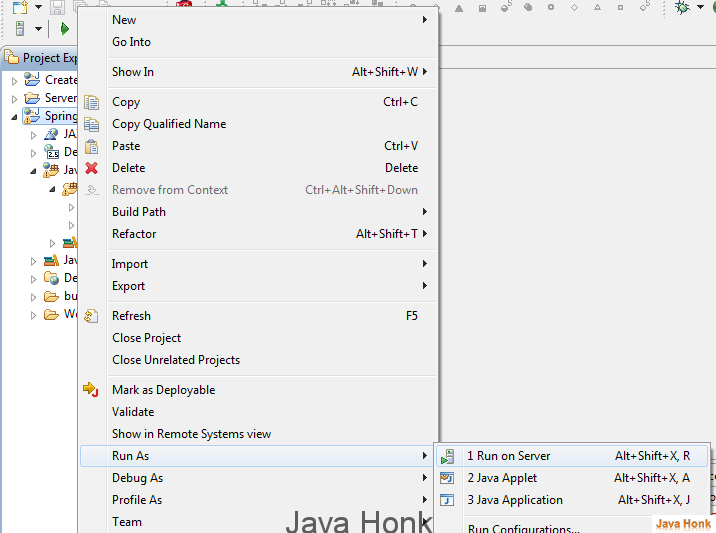
- That’s it. Now right click project –> Click Run As –> Run on Server as below:
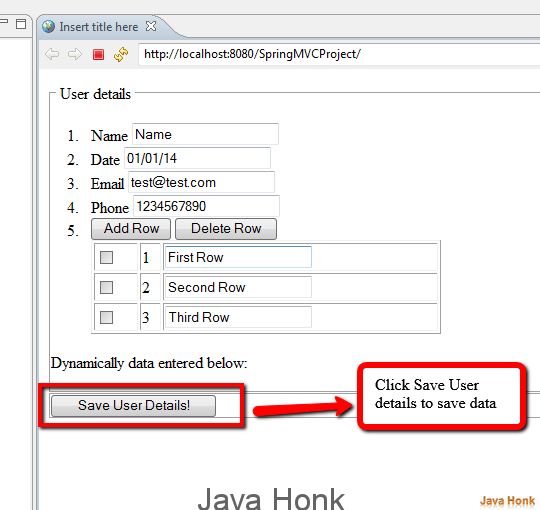
- You will see below. Please enter data and test it.
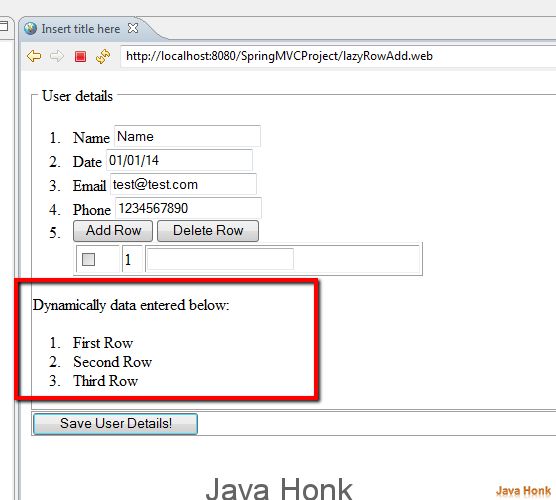
- After Save User Details you will see below data that entered above.
- That’s it.
![]() Download project: SpringMVCProject
Download project: SpringMVCProject

can you please explain me how you are printing newly added fileds. am unable to catch that.
please explain me…
Achilles – First you will have to create bean as per your choice where you want to populate data. For above example we are using OperationParameters with one attribute name. Next thing create LazyList in your model with getter and setter as below:
private List operationParameterses = LazyList.decorate(new ArrayList (),FactoryUtils.instantiateFactory(OperationParameters.class));
On JSP page populate the parameter as below:
operationParameterses[0].name
and its up to you how you want to fill out data here. Our example we are using javascript to dynamically fill the data. Hope this helps.
Thanks for the wonderful post, it is very helpful!!
Did you ever got a chance to implement validation in this dynamic list code? I tried to do that i.e. stored the fields values in the model and when BindingResult returned the same model to the JSP code, it displayed only first/single dynamic row. Therefore, user has to input again the rest of the dynamic rows.
Any idea how that this can be fixed?
Thanks again for your efforts and knowledge sharing!!
Sandeep – You could use same logic what you do with single field. As you know its list so put validation error on each field during iteration.
Hiii Thanks for your tutorial, it helps me a lot.
But I am facing problem in deleting row. As my “operationParameterses[“+length+”].name” attribute cannot be null.
For eg if i create 3 rows and if i delete middle row then it is throwing exception: name cannot be null which is obvious exception.