Struts Pagination Display Tag
Display tag library is an open source which is bundled with custom tag and provides flexible pagination and it’s very popular to achieve pagination on any MVC model web application. Its designs are configurable to implement different look including export functionality where we can export page data in different format.
This tutorial will show you how to implement Struts Pagination Display Tag with sample data.
Please note this demo is using Struts 2.
Below are needed:
- Eclipse 3.2 or above (Download from here) – Note for this demo we have use eclipse kepler
- JDK 1.6 or above (Download from here )
- Tomcat 6 or above (Please follow link to install and configure tomcat in eclipse: Configure and Run Tomcat server in eclipse )
- Struts 2 jars which is already included in project for download in the bottom
- Display tag jars is already included in project for download in the bottom ( You could also download from Display tag site here)
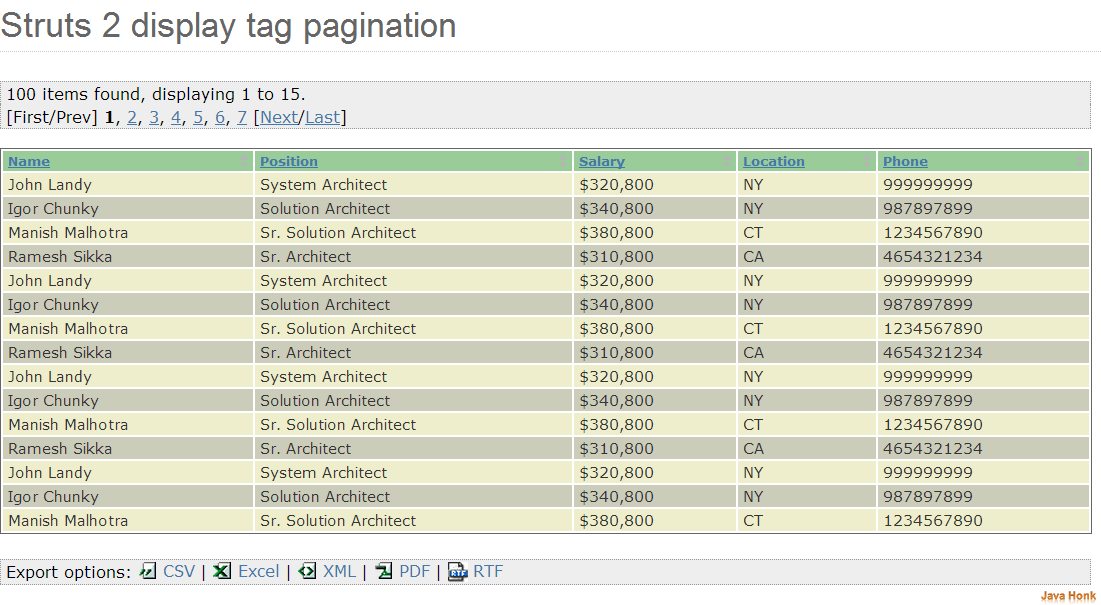
After all set up and configuration you will see below screen:
- Create dynamic web project in eclipse name: StrutsDisplayTagPagination (Please use this link if you are not familiar how to create dynamic project in eclipse: Create Dynamic Web Project Eclipse)
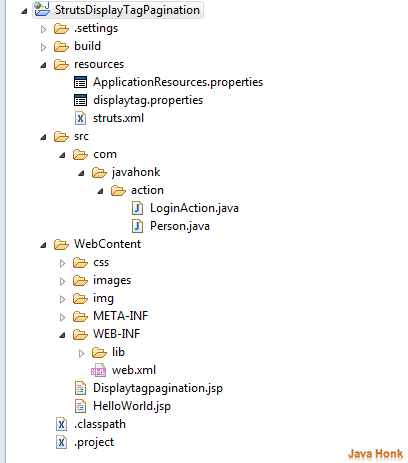
- Below shows project structure:
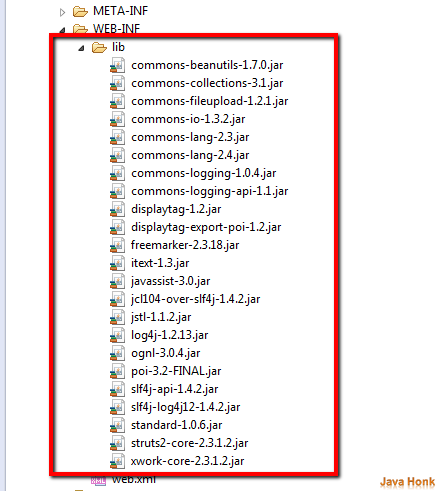
- Lib folder in project
- Please copy below XML into your web.xml file
<?xml version="1.0" encoding="UTF-8"?>
<web-app id="WebApp_9" version="2.4"
    xmlns="http://java.sun.com/xml/ns/j2ee"
    xmlns:xsi="http://www.w3.org/2001/XMLSchema-instance"
    xsi:schemaLocation="http://java.sun.com/xml/ns/j2ee http://java.sun.com/xml/ns/j2ee/web-app_2_4.xsd">

    <display-name>Struts 2 Hello World Application</display-name>
    <filter>
        <filter-name>struts2</filter-name>
        <filter-class>
            org.apache.struts2.dispatcher.FilterDispatcher
        </filter-class>
    </filter>
    <filter-mapping>
        <filter-name>struts2</filter-name>
        <url-pattern>/*</url-pattern>
    </filter-mapping>
    <welcome-file-list>
        <welcome-file>HelloWorld.jsp</welcome-file>
    </welcome-file-list>

</web-app>
- Create HelloWorld.jsp inside WebContent folder and copy paste below code:
<%@ page contentType="text/html; charset=UTF-8"%>
<%@ taglib prefix="s" uri="/struts-tags"%>
<html>
<head>
<title>Struts 2 - Display tag pagination </title>
</head>

<body>
<h2><s:text name="label.helloWorld"/></h2>
<s:form action="login.action" method="post">

    <s:submit method="execute" key="label.displaytag" align="center" />
</s:form>

</body>
</html>
- Create Displaytagpagination.jsp inside WebContent folder and copy paste below code:
<%@ page contentType="text/html; charset=UTF-8"%>
<%@ taglib prefix="s" uri="/struts-tags"%>
<%@taglib uri="http://displaytag.sf.net" prefix="display" %>
<html>
<head>
<title>Struts 2 display tag pagination</title>
<link rel="stylesheet" type="text/css" href="css/alternative.css">
    <link rel="stylesheet" type="text/css" href="css/displaytag.css">
    <link rel="stylesheet" type="text/css" href="css/maven-base.css">
    <link rel="stylesheet" type="text/css" href="css/maven-theme.css">
    <link rel="stylesheet" type="text/css" href="css/print.css">
    <link rel="stylesheet" type="text/css" href="css/screen.css">
    <link rel="stylesheet" type="text/css" href="css/site.css">
    <link rel="stylesheet" type="text/css" href="css/teststyles.css">
</head>

<body>
    <h2>Struts 2 display tag pagination</h2>
    <!-- To change column style please form this classes ISIS OR ITS OR Mars OR Simple OR Report OR Mark Column
    We have chosen style class="Mars"-->
    <display:table export="true"  name="personsList" requestURI="/login.action" pagesize="15" class="Mars" >
        <display:column property="name" title="Name" sortable="true"   />
        <display:column property="position" title="Position" sortable="true"  />
        <display:column property="salary" title="Salary" sortable="true"  />
        <display:column property="location" title="Location" sortable="true"  />
        <display:column property="phone" title="Phone" sortable="true"  />
    </display:table>
</body>
</html>
Below are available once you download project in bottom:
- Create css folder inside WebContent folder and include all css which shows in jsp page inside it. You download project
- Create images folder inside WebContent folder and include all images
- Create img folder inside WebContent folder and include all images
- Copy all jar in lib folder
- Now create resources folder as source folder inside project
- Create ApplicationResources.properties inside resources folder and copy paste below code:
label.helloWorld = Struts 2 Display tag pagination
label.displaytag= Go to display tag pagination page
- Create displaytag.properties inside resources folder and copy paste below code:
#sort.behavior=list
#sort.amount=list
#basic.empty.showtable=true
#basic.msg.empty_list=No results matched your criteria.
#paging.banner.placement=top
#paging.banner.onepage=<span class="pagelinks"></span>
export.types=csv excel xml pdf rtf
export.excel=true
export.csv=true
export.xml=true
export.pdf=true
export.rtf=true
export.excel.class=org.displaytag.export.excel.DefaultHssfExportView
export.pdf.class=org.displaytag.export.DefaultPdfExportView
export.rtf.class=org.displaytag.export.DefaultRtfExportView
# if set, file is downloaded instead of opened in the browser window
#export.[mymedia].filename=
- Create struts.xml inside resources folder and copy paste below code:
<?xml version="1.0" encoding="UTF-8" ?>
<!DOCTYPE struts PUBLIC
    "-//Apache Software Foundation//DTD Struts Configuration 2.0//EN"
    "http://struts.apache.org/dtds/struts-2.0.dtd">

<struts>
    <constant name="struts.enable.DynamicMethodInvocation"
        value="false" />
    <constant name="struts.devMode" value="false" />
    <constant name="struts.custom.i18n.resources"
        value="ApplicationResources" />

    <package name="default" extends="struts-default" namespace="/">
        <action name="login"
            class="com.javahonk.action.LoginAction">
            <result name="success">Displaytagpagination.jsp</result>
            <result name="error">HelloWorld.jsp</result>
        </action>
    </package>
</struts>
- Create package name: com.javahonk.action inside src folder
- Create class name LoginAction.java inside com.javahonk.action package and copy paste below code:
package com.javahonk.action;

import java.util.ArrayList;
import java.util.List;

import com.opensymphony.xwork2.ActionSupport;

public class LoginAction extends ActionSupport {

    private static final long serialVersionUID = 1L;
    List<Person> personsList = new ArrayList<Person>();

    public String execute() {

        for (int i = 0; i < 25; i++) {
            Person person2 = new Person();
            person2.setName("John Landy");
            person2.setPosition("System Architect");
            person2.setSalary("$320,800");
            person2.setLocation("NY");
            person2.setPhone("999999999");
            personsList.add(person2);

            person2 = new Person();
            person2.setName("Igor Chunky");
            person2.setPosition("Solution Architect");
            person2.setSalary("$340,800");
            person2.setLocation("NY");
            person2.setPhone("987897899");
            personsList.add(person2);

            person2 = new Person();
            person2.setName("Manish Malhotra");
            person2.setPosition("Sr. Solution Architect");
            person2.setSalary("$380,800");
            person2.setLocation("CT");
            person2.setPhone("1234567890");
            personsList.add(person2);

            person2 = new Person();
            person2.setName("Ramesh Sikka");
            person2.setPosition("Sr. Architect");
            person2.setSalary("$310,800");
            person2.setLocation("CA");
            person2.setPhone("4654321234");
            personsList.add(person2);

            person2 = new Person();
            person2.setName("Bob Sidebottom");
            person2.setPosition("Architect");
            person2.setSalary("$300,800");
            person2.setLocation("NJ");
            person2.setPhone("9876543212");
    }

        setPersonsList(personsList);
        return "success";

    }

    public List<Person> getPersonsList() {
        return personsList;
    }

    public void setPersonsList(List<Person> personsList) {
        this.personsList = personsList;
    }


}
- Create Person.java inside com.javahonk.action package and copy paste below code:
package com.javahonk.action;

import java.util.List;

public class Person {

    private String name;
    private String position;
    private String salary;
    private String location;
    private String phone;

    private List<Person> personList;

    public String getName() {
        return name;
    }
    public void setName(String name) {
        this.name = name;
    }
    public String getPosition() {
        return position;
    }
    public void setPosition(String position) {
        this.position = position;
    }
    public String getSalary() {
        return salary;
    }
    public void setSalary(String salary) {
        this.salary = salary;
    }
    public String getLocation() {
        return location;
    }
    public void setLocation(String location) {
        this.location = location;
    }
    public String getPhone() {
        return phone;
    }
    public void setPhone(String phone) {
        this.phone = phone;
    }
    public List<Person> getPersonList() {
        return personList;
    }
    public void setPersonList(List<Person> personList) {
        this.personList = personList;
    }

}
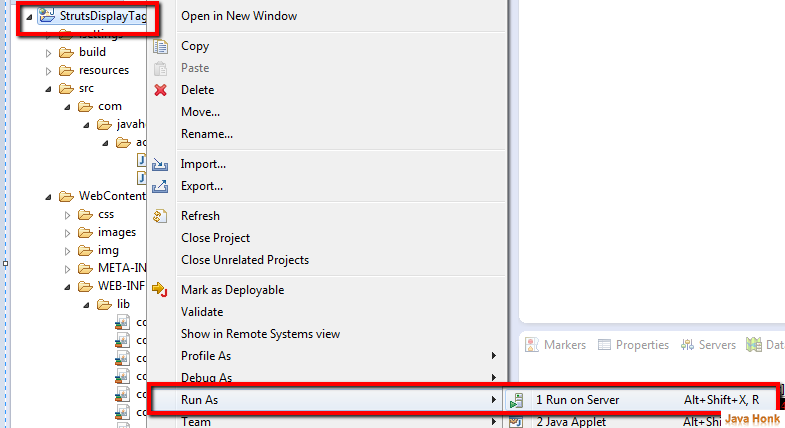
- Now lets run this set up in tomcat server. If you haven’t done tomcat set up in eclipse yet please use this link: Configure and Run Tomcat server in eclipse. Now right click project –>Run As –> Run on server as below:
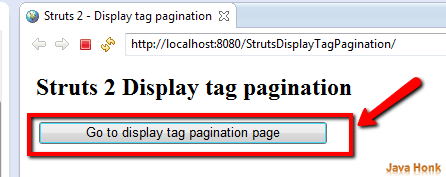
- You will see below welcome screen with pagination button click it to go pagination screen:
- Finally you will see below pagination screen with data click on column name to sort it and export option to export page in various formats:
![]() Download Project: StrutsDisplayTagPagination
Download Project: StrutsDisplayTagPagination
That’s it Struts Pagination Display Tag completed.

please tell me how to change the css of the next and pre ancher tags as buttion
Please see their official documentation below:
http://demo.displaytag.org/displaytag-examples-1.2/example-styles.jsp
http://www.displaytag.org/1.2/